Author – Sushant P. Chavan, Cloud Engineer
Overview
Welcome to the world of Packer! This introduction guide will show you what Packer is, explain why it exists, the benefits it has to offer, and how you can get started with it.
What is Packer?
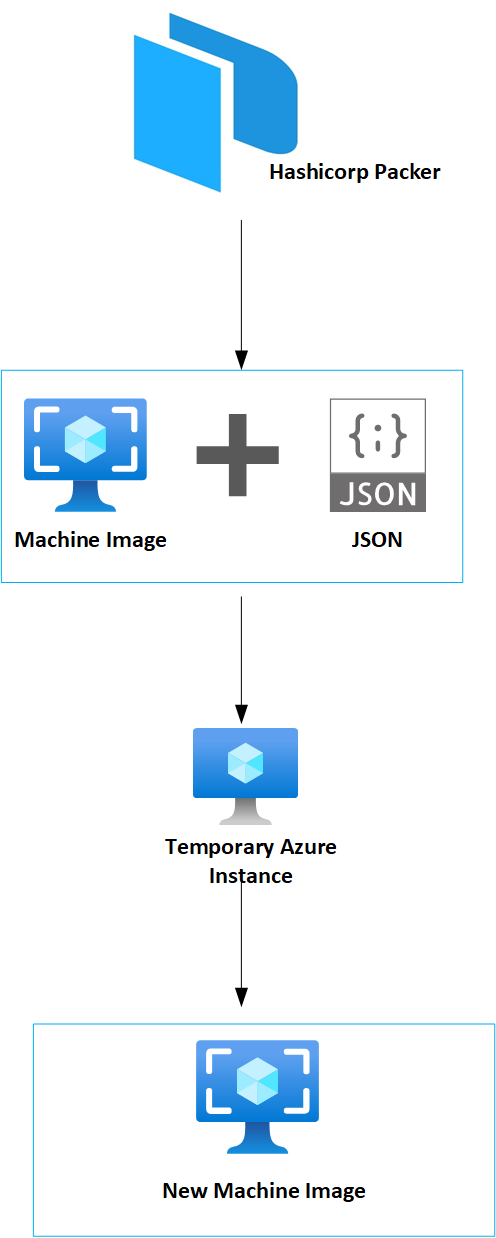
Packer is an open-source tool for creating identical machine images for multiple platforms from a single source configuration. Packer is lightweight, runs on every major operating system, and is highly performant, creating machine images for multiple platforms in parallel. Packer does not replace configuration management like Chef or Puppet. In fact, when building images, Packer can use tools like Chef or Puppet to install software onto the image.
There are many advantages of using packer:-
- Fast infrastructure deployment. Packer images allow you to launch completely provisioned and configured machines in seconds.
- Multi-Cloud portability. Because Packer creates identical images for multiple platforms, you can use those images to run your machines on any Cloud Provider platform.
- Enhance stability. Packer installs and configures all the software for a machine at the time the image is built.
- Durable To Test:– After a machine image is built, that machine image can be quickly launched and smoke tested to verify that things appear to be working. If they are, you can be confident that any other machines launched from that image will function properly.
Prerequisites On Deploying Packer On Azure:
- Install PowerShell:
- Install Azure CLI:
- Install chocolaty:
- Install packer:
Steps For Deploying Packer On Azure:
1.Goto The PowerShell command line.
2.Login azure: Az login.
3.Cd to your packer file path/folder.
4.For validate packer file use: packer validate ./file.json.
5.Once validation is completed build image using this: packer build ./file.json.
6.Deploying starts.
Prerequisites For packer Json File In Azure Environment:
Before proceeding, we must know prerequisite of azure is totally different from AWS AMI
Regarding client secrete, app id, password.
1.Service Principle: Service principals are non-interactive Azure accounts. Like other user accounts, their permissions are managed with Azure Active Directory. By granting a service principal only the permissions it needs, your automation scripts stay secure.
- To create a service principle you have to follow these rights
- Subscription owner
- AAD tenant administer
(Note: without service principle, we can’t deploy packer in azure)
i.To create service principal following is a command:- az ad sp
create-for-rbac –name packertest2.
- After hitting this command we get the following outputs:-
“appId”: “4exxxxxxxxxxxxxxx89d”,
“displayName”: “packertest2”,
“name”: “http://packertest2”,
“password”: “Mw~bwxxxxxxxxxxx-kIx8G.”,
“tenant”: “58bxxxxxxxxxxbe-2567712e9155”
2.Builders: Builder is VM’s configuration Builders are responsible for creating machines and generating images from them for various platforms.
Azure Builders parameter is different than AWS Builders.
A Standard Windows Image Builder.
“builders”: [{
“type”: “azure-arm”,
“client_id”: “4e4xxxxxxxxxxxxxxxxx5d”,
“client_secret”: “Mxxxxxxxxxxxxxxxxxxx8G.”,
“tenant_id”: “58xxxxxxxxxxxxxxxxxxx55”,
“subscription_id”: “65xxxxxxxxxxxxxxxxxx2”,
“managed_image_resource_group_name”: “tfpacker-rg”,
“managed_image_name”: “tfimage01”,
“os_type”: “Windows”,
“image_publisher”: “MicrosoftWindowsServer”,
“image_offer”: “WindowsServer”,
“image_sku”: “2016-Datacenter”,
“communicator”: “winrm”,
“winrm_use_ssl”: true,
“winrm_insecure”: true,
“winrm_timeout”: “30m”,
“winrm_username”: “packer”,
“azure_tags”: {
“dept”: “First Deployment”,
“task”: “Image deployment”
},
“build_resource_group_name”: “tfpacker-rg”,
“vm_size”: “Standard_D2_v2”
}],
Note: (Winrm is the communicator for windows Machine, same as for Linux machine ssh is there the purpose of this communicator is extend the time of VM while creating image mostly use for SQL servers)
3.Provisioners: Provisioners are optional. If no provisioners are defined within a template, then no software other than the defaults will be installed within the resulting machine images. This is not typical, however, since much of the value of Packer is to produce multiple identical images of pre-configured software.
Note: (Provisioners are optional but for windows and Linux both are needed to agent provisioners)
Eg.
Windows:
“provisioners”: [{
{
“type”: “powershell”,
“inline”: [
“while ((Get-Service RdAgent).Status -ne ‘Running’) { Start-Sleep -s 5 }”,
“while ((Get-Service WindowsAzureGuestAgent).Status -ne ‘Running’) { Start-Sleep -s 5 }”,
“& $env:SystemRoot\\System32\\Sysprep\\Sysprep.exe /oobe /generalize /quiet /quit”,
“while($true) { $imageState = Get-ItemProperty HKLM:\\SOFTWARE\\Microsoft\\Windows\\CurrentVersion\\Setup\\State | Select ImageState; if($imageState.ImageState -ne ‘IMAGE_STATE_GENERALIZE_RESEAL_TO_OOBE’) { Write-Output $imageState.ImageState; Start-Sleep -s 10 } else { break } }”
]
}
Linux:
“provisioners”: [{
{
“execute_command”: “chmod +x {{ .Path }}; {{ .Vars }} sudo -E sh ‘{{ .Path }}'”,
“inline”: [
“apt-get update”,
“apt-get upgrade -y”,
“/usr/sbin/waagent -force -deprovision+user && export HISTSIZE=0 && sync”
],
“inline_shebang”: “/bin/sh -x”,
“type”: “shell”
}
]
}
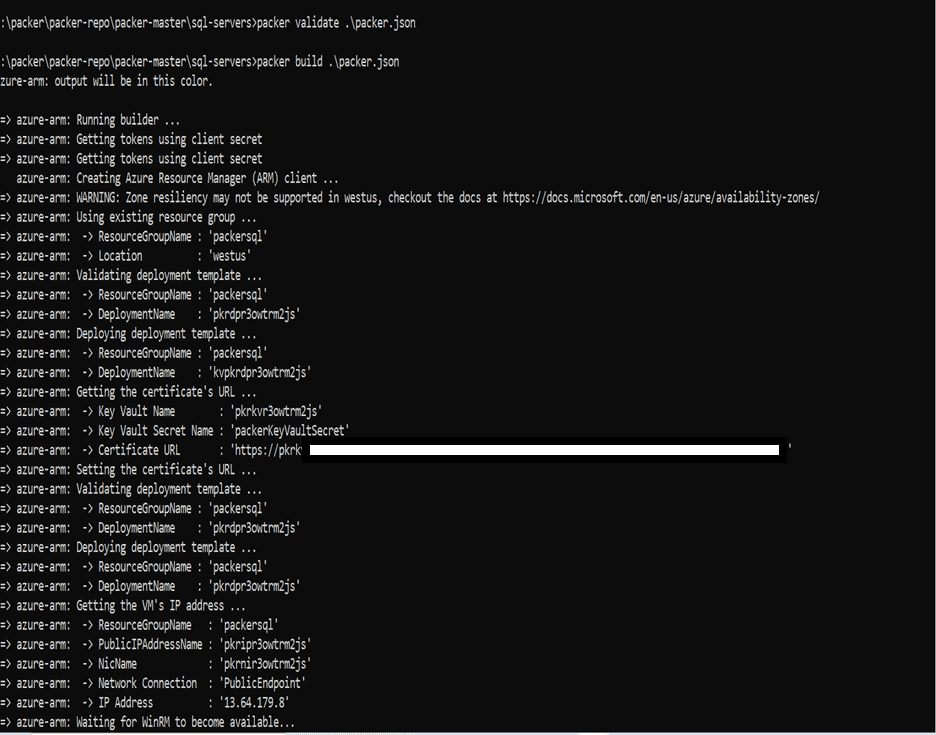
SNAPS OF DEPLOYMENT:-
1.Initialize Packer Components.
2.Uploading Packages and exe in base image.
3.Install Chocolaty Package Manager.

4.Installing .Net Packages.

5.Auto Delete Temporary Resources and Integrate in One Azure Image Deploy Successfully.


