Introduction: Today many companies have their data which resides not only on the on-premises but also on cloud hosted at the Microsoft Azure data centre. There is an increasing need to maintain the sync between both the servers. In order to maintain the same Microsoft SQL has supported replication services. Transactional replication is a good solution to the problem of moving data between continuously connected servers. By using the Replication Wizard, you can easily configure and administer a replication topology. In this document Transactional Replication has been explained in detail.
Overview: The below steps would help configuring Transactional Replication between an On-Prem Server and an Azure SQL Database.
- Prerequisites:
- The server role must be a sysadmin role.
- The database selected must at least have one article selected. The tables selected as articles must necessarily have a primary key.
- The non-clustered indexes must be scripted out before hand as they would not be replicated.
- Configure Distribution:
- To first set up Transactional Replication, one must configure the SQL Replication Distributor.
- In Object Explorer, browse to the replication folder, right-click the Replication folder, and click Configure Distribution

- The existing server will act as the Distributor or you can configure another server to act as a Distributor.
- Further you will be prompted to add the path to a Snapshot folder path, you can also choose the default path.
- This setup creates a Distribution database which monitors the entire Replication setup.
- Configure Publisher:
- In Object Explorer, locate the Replication folder, right-click Local Publication, and then click New Publication

- Next, the New Publication Wizard appears and outlines the general information about creating Publication.

- In the Publication Database page, select the Test database and click Next.

- On the Publication Type page, select Transactional publication, and click Next.

- Now, on the Articles page, choose the articles should be part of this publication.

- In the Snapshot Agent page specify when to run the Snapshot Agent. It can be run immediately, or it can schedule to run later. In this case, create a snapshot immediately is used.

- Now, in the Agent Security page, specify the account to use to run the Snapshot Agent using Security settings…

- Click Ok
- Type in the publication name and Click Finish.

- In the Creating Publication page, you’ll find information about the wizard’s progress as it works through each step of the process.

- Now, you can see that Publication is created under the local publication folder

- Configure Subscriber
- In Object Explorer, expand the Replication folder, right-click Local Subscriptions, and then click New Subscriptions.

- The New Subscription Wizard appears outlines the general information about the wizard.
- On the Publication page, select Publication and then click Next

- On the Distribution Agent location page, select “Run all agents at the Distributor” and Click Next

- On the Subscribers page, select Add Subscriber, and then select Add SQL Server Subscriber from the drop-down. This step opens the Connect to Server dialog box. Enter the subscriber instance name and then select Connect.

- After the subscriber SQL instance has been added, select the drop-down next to the instance name of your subscriber. Then select New Database under Subscription Database and type in the database name and Click Ok.
- The subscription database is created and registered to the subscriber. Now, click Next. Make sure that the account has db_owner permission on the newly created database.
- On the Distribution Agent Security page, select the ellipsis (…) button. Type in the process account details and Click Ok.

- Select Finish accepting the default values on the remaining pages and completing the wizard.
- On the complete the wizard page, you can see the detailed summary of the newly created subscription. Click Finish
- In the Creating Subscription(s)…page should show that the process has been successful or not.

- Once the Replication has been configured successfully, make a note to run the scripts for creating the non-clustered indexes as mentioned in the pre-requisites at the Subscriber Sever Databases as replication does not transfer the non-clustered indexes.
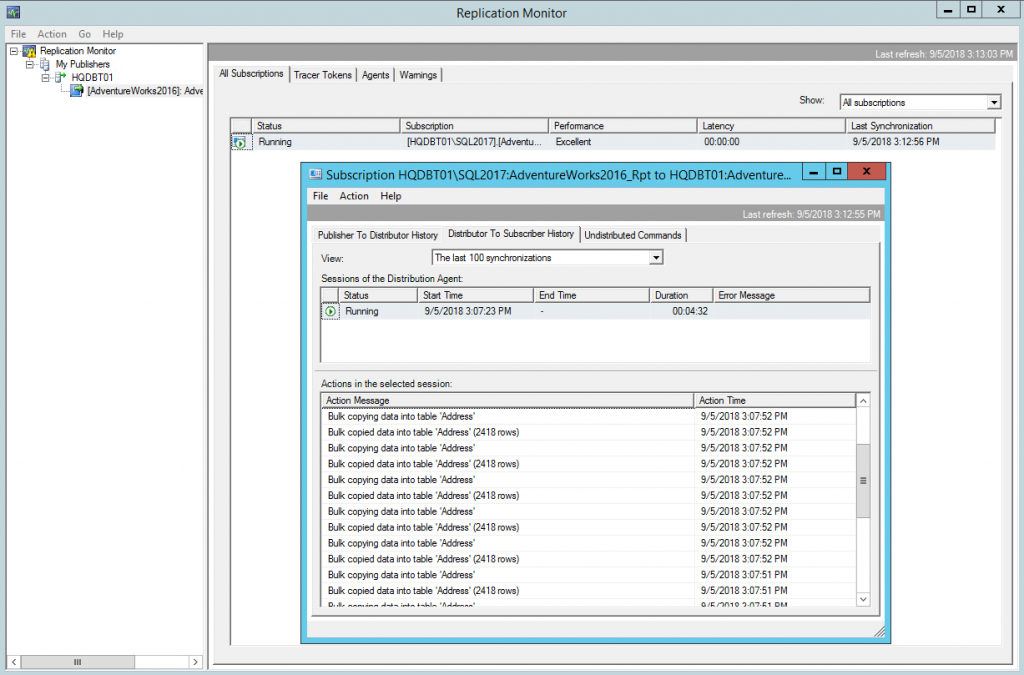
- Connect to the publisher in SQL Server Management Studio. In the Object explore, right-click the Replication folder, and then select Launch Replication Monitor to verify the status of the newly created transactional replication setup.

Conclusion: In this article, we’ve successfully configured Publisher, Local Distributor and Subscriber using transactional SQL replication model. You can now insert, delete, or update the data in the articles to see the data propagation mechanism between the servers.


