Author – Stuti Dhebar, Cloud Engineer Intern
Often when we are using a service or planning to use a new one, we come across several questions. Many of these questions could have already been answered in the FAQ pages of the service’s website. The problem arises when we are dealing with large websites because the FAQ pages for such websites can contain a lot of data & hence it becomes difficult for users to find their queries. Also, accessing these FAQ pages from certain devices can be a tedious task! This is when a QnA Maker comes in the scenario.
What is a QnA Maker?
QnA maker is a free, easy-to-use, REST API, and web-based service which allows us to create chatbots that answer users’ questions swiftly with the help of a knowledge base. In other terms, we train the chatbot with a set of questions & answers to those questions. These questions can be asked by the users in different forms, but the answer will remain static for such questions. For example, the question is “How to turn off Apple TV with remote?” or “How do I turn off Apple TV HD?”, the answer will remain static for both the questions i.e. “Since there isn’t a power button, you can’t turn off your Apple TV. Instead, you can put your Apple TV to sleep.”.
Create a QnA Maker
This involves the following steps:
- Create a QnA Maker Account
- Create a Knowledge Base
- Populate your Knowledge Base
- Train your Knowledge Base
- Test your Knowledge Base
- Create an Azure Web App Bot
- Test your Bot using Azure Portal
Let’s look at each step in detail.
Create a QnA Maker Account
Go to https://www.qnamaker.ai/ & click on “Sign in” to create a new account or use an existing one.
Create a Knowledge Base
This consists of five steps:
- Create a QnA Service in Microsoft Azure – Click on “Create a QnA service”

- Connect your QnA service to your KB
- Name your KB
- Populate your KB (Optional) – Populate using URLs, .txt/.xls files or add content manually. You can enable the chit-chat option (if required)
- Create your KB – Click on “Create your KB”
Populate your Knowledge Base
Three ways to populate knowledge base are:
- URLs – Copy & paste the URL of your data source in the field (as shown below). This will extract all the information from that page to the knowledge base
- Importing .xls & .txt files – When you import the excel or text file (as shown above), it’s content will be visible in your knowledge base
- Adding questions & answers manually – For adding QnA pair manually, go to “Edit” & click on “+ Add QnA pair”, you can add alternative phrases as well by clicking on “+” below your question & answer
After populating the knowledge base, click on “Save and Train”, this will ensure that your data has been saved to your knowledge base. To view your knowledge base, select “Edit” in the navigation bar
Train the Knowledge Base
To train, click on “Save and Train” in the navigation bar
![]()
Test the Knowledge Base
- Publishing the KB – Go to “Publish” in the navigation bar & click on “Publish”. This will publish your KB to the QnA service you created above
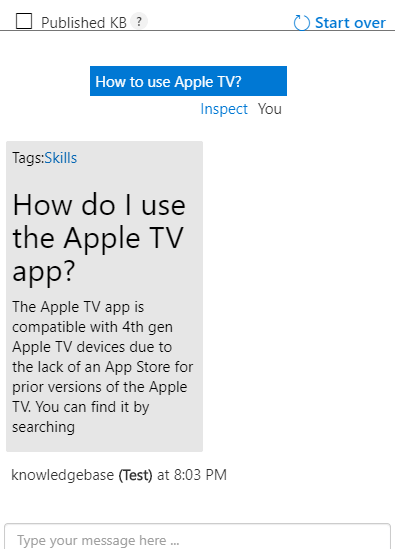
- Testing the KB – When you click on “Test” in the navigation bar, it will open a window where you can ask questions & verify whether your KB is working properly or not

Create an Azure Web App Bot
- Re-publish the knowledge base (in case any changes have been made to your data source) – Click on “Publish”
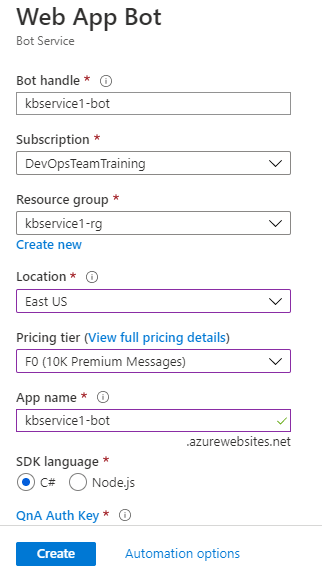
- Once published, go to “Create Bot”, this will take you to the Azure Portal where you will have to fill the details (as shown below)
Test the Bot using Azure Portal
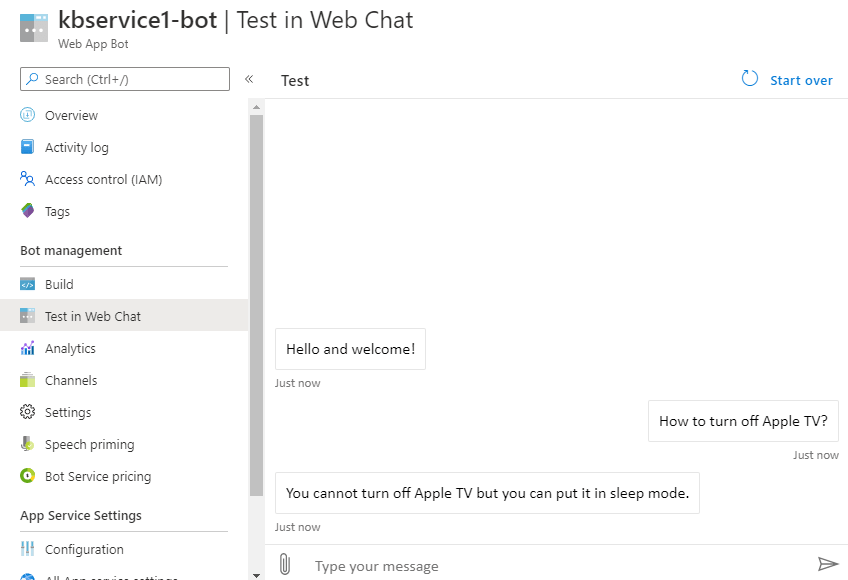
- In the Azure Portal, go to the Bot you created & in the side navigation bar click on “Test in Web Chat”. You can now verify whether your Bot is working as expected
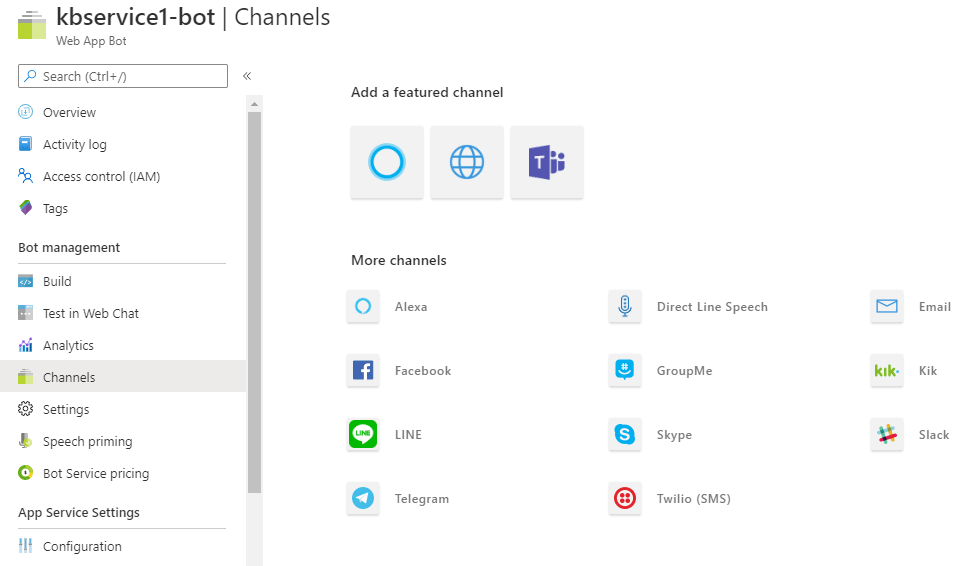
- If you want to connect your Bot to other communication platforms like Skype, Slack, Twilio, etc., go to “Channels” in the side navigation bar, and choose the one you want & click on “Connect”
If you want to know more about QnA Maker, you can check out the documentation here https://www.qnamaker.ai/ & some GitHub example here https://github.com/Microsoft/BotBuilder-CognitiveServices/tree/master/Node/samples
Interested in Microsoft Azure, Let’s CONNECT!


