Author – Ayush Chauhan, Associate Data Engineer
INTRODUCTION
In this article, we will learn how we can load multiple files from a storage account and how to transform data back to it and azure database, along with how to automate this whole process, so one didn’t have to change any variables or write any extra line of code to address the new files if up-fronting by our storage account.
With unprecedented volumes of data being generated, captured, and shared by organisations, fast processing of this data to gain meaningful insights has become a dominant concern for businesses. One of the popular frameworks that offer fast processing and analysis of big data workloads is Apache Spark. Azure Databricks is the implementation of Apache Spark analytics on Microsoft Azure, and it integrates well with several Azure services like Azure Gen 2 storage, Azure Synapse Analytics, and Azure SQL Database, etc. Spinning up clusters in fully managed Apache Spark environment with benefits of Azure Cloud platform could have never been easier.
Data processing is one vital step in the overall data life cycle. Once this data is processed with the help of fast processing clusters, it needs to be stored in storage repositories for it to be easily accessed and analysed for a variety of future purposes like reporting.
In this article, we will load the processed data into the SQL Database on Azure from Azure Databricks. Databricks in Azure supports APIs for several languages like Scala, Python, R, and SQL.
Before we start with our exercise, we will need to have the following prerequisites:
- You need to have an active Azure Subscription.
- Azure Storage – You need to set up storage Gen2 storage under Azure Storage.
- Azure Databricks – You need to set up both Databricks service and cluster in Azure, you can go over the steps in this article. As shown in this article, we have created a Databricks service.
- Azure SQL Database – Creating a SQL Database on Azure is a straight-forward process. I have put out screenshots below to throw a quick idea on how to create a SQL Database on Azure.
Let’s go ahead and demonstrate the data load into SQL Database using Python notebooks from Databricks on Azure.
Create a Azure SQL Database
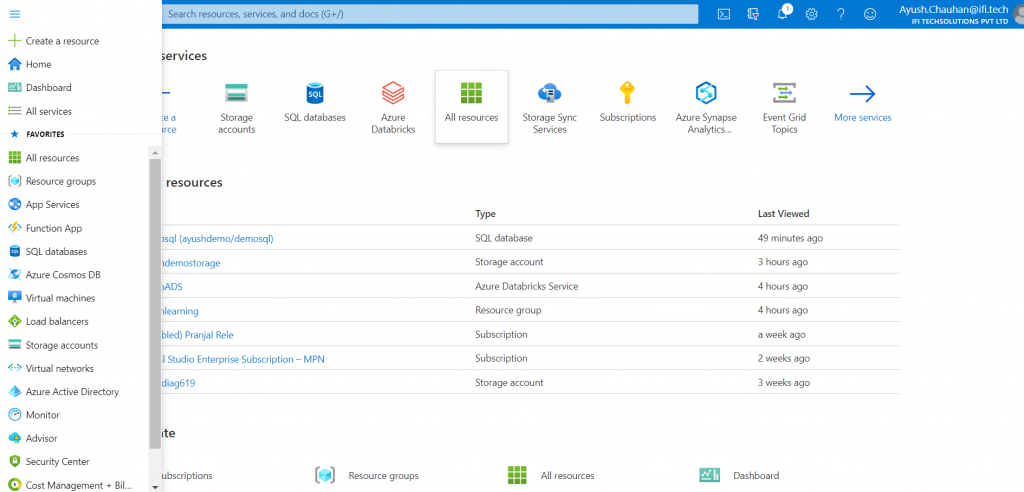
STEP 1 :On the Azure portal, you can either directly click on Create a resource button or SQL databases on the left vertical menu bar to land on the Create SQL Database screen.
Step 2:Provide details like Database name, its configuration, and create or select the Server name. Click on the Review + create button to create this SQL database on Azure.
Step 3: Make sure in firewall settings set ‘Yes’ into ‘Allow Azure services and resources to access this server’.
Create a Basic ADLS Gen 2 Data Lake and Load in Some Data
The first step in our process is to create the ADLS Gen 2 resource in the Azure Portal that will be our Data Lake for this walkthrough.
STEP 1 :Navigate to the Azure Portal, and on the home screen click ‘Create a resource’.
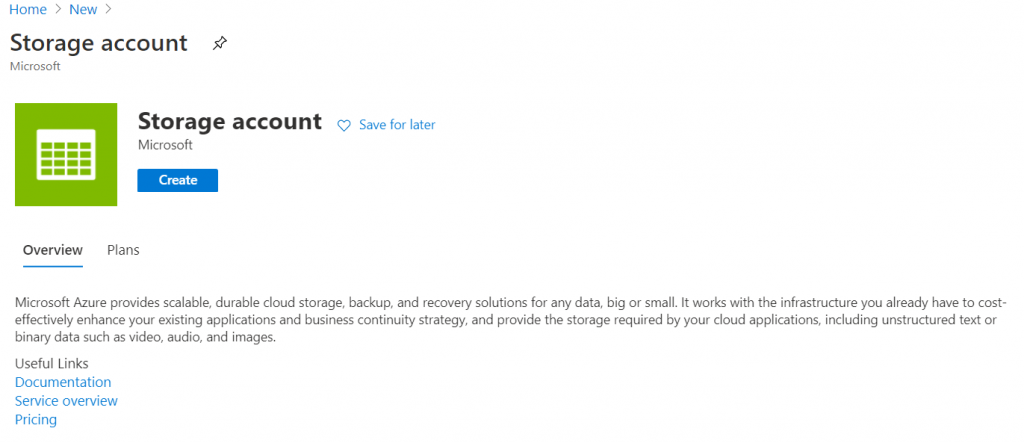
STEP 2 :Search for ‘Storage account’ ,click it and then press ‘Create’.
Make sure the proper subscription is selected – this should be the subscription where you have the free credits. Next select a resource group.If you do not have an existing resource group to use – click ‘Create new’. A resource group is a logical container to group Azure resources together.Next, pick a Storage account name. This must be a unique name globally.
Pick a location near you or use whatever is default. Keep ‘Standard’ performance for now and select ‘StorageV2’ as the ‘Account kind’. For ‘Replication’, select ‘Locally-redundant storage’. Finally, keep the access tier as ‘Hot’.
Your page should look something like this:
STEP 3 :Click ‘Next: Networking’, leave all the defaults here and click ‘Next: Advanced’.
Here is where we actually configure this storage account to be ADLS Gen 2.
STEP 4 :Under the Data Lake Storage Gen2 header, ‘Enable’ the Hierarchical namespace.
This is the field that turns on data lake storage.
STEP 5:Finally, click ‘Review and Create’.
STEP 6:You should be taken to a screen that says ‘Validation passed’.
STEP 7:Click ‘Create’ in the bottom left corner.
It should take less than a minute for the deployment to complete.
STEP 8:Click ‘Go to resource’ to view the data lake.
STEP 9:Right click on ‘+ CONTAINERS’ to create it and then open it to click’+ adddirectory’.
This will be the root path for our data lake.
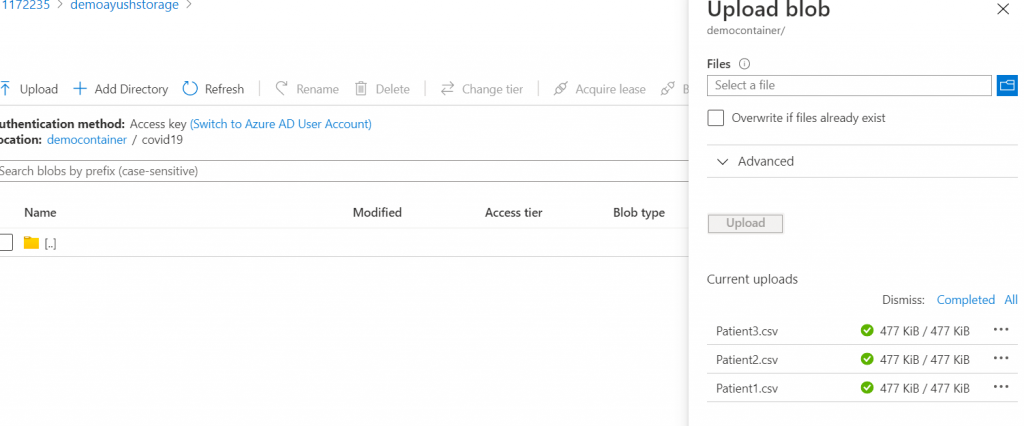
STEP 10 :Click on ’upload ’ and select files from your local drive .
STEP 11:Go back to ‘overview’ for storage account and click on ‘Access key’ to copy ‘Key1’. Save it for later use.
Create a Databricks Workspace
The next step is to create a Databricks Workspace. You can think of the workspace like an application that you are installing within Azure, where you will access all of your Databricks assets.Follow these steps to create a workspace:
- On the Azure home screen, click ‘Create a Resource’.
- In the ‘Search the Marketplace’ search bar, type ‘Databricks’ and you should see ‘Azure Databricks‘ pop up as an option. Click that option.
- Click ‘Create’ to begin creating your workspace.
Use the same resource group you created or selected earlier. Then, enter a workspace name. Remember to always stick to naming standards when creating Azure resources, but for now enter whatever you would like. You can keep the location as whatever comes default or switch it to a region closer to you. For the pricing tier, select ‘Trial’. Finally, select ‘Review and Create‘. We can skip networking and tags for now which are for more advanced set-ups.
- This should bring you to a validation page where you can click ‘create’ to deploy your workspace. This will bring you to a deployment page and the creation of the workspace should only take a couple minutes.
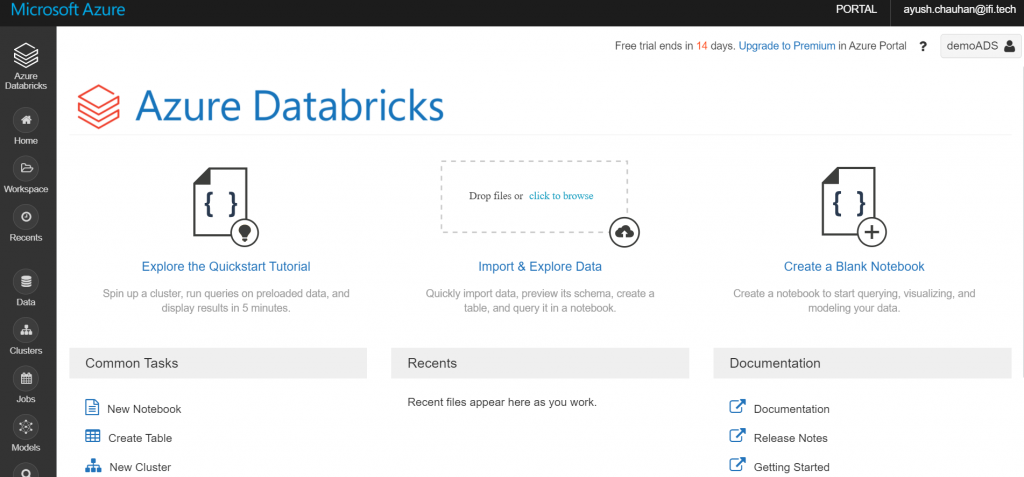
- Once the deployment is complete, click ‘Go to resource‘ and then click ‘Launch Workspace’ to get into the Databricks workspace.
Explore Options for Accessing Data Lake from Databricks
The following information is from the Databricks docs:
There are three ways of accessing Azure Data Lake Storage Gen2:
- Mount an Azure Data Lake Storage Gen2 filesystem to DBFS using a service principal and OAuth 2.0.
- Use a service principal directly.
- Use the Azure Data Lake Storage Gen2 storage account access key directly.
For this tip, we are going to use option number 3 since it does not require setting up Azure Active Directory.
Use the Azure Data Lake Storage Gen2 storage account access key directly:
- This option is the most straightforward and requires you to run the command setting the data lake context at the start of every notebook session.
- You will see in the documentation that Databricks Secrets are used when setting all of these configurations.
Now, let’s connect to the data lake! Start up your existing cluster so that it is ready when we are ready to run the code. If you do not have a cluster, create one.
To set the data lake context, create a new Python notebook and paste the following code into the first cell:
|
Replace ‘<storage-account-name>‘ with your storage account name.
In between the double quotes on the third line, we will be pasting in an access key for the storage account that we grab from Azure. Again, the best practice is to use Databricks secrets here, in which case your connection code should look something like this:
|
Paste the key1 Key in between the double quotes in your cell that I mentioned earlier in this article to copy. Your code should now look like this:
|
Attach your notebook to the running cluster, and execute the cell. If it worked, you should just see the following:
For the duration of the active spark context for this attached notebook, you can now operate on the data lake. If your cluster is shut down, or if you detach the notebook from a cluster, you will have to re-run this cell in order to access the data.
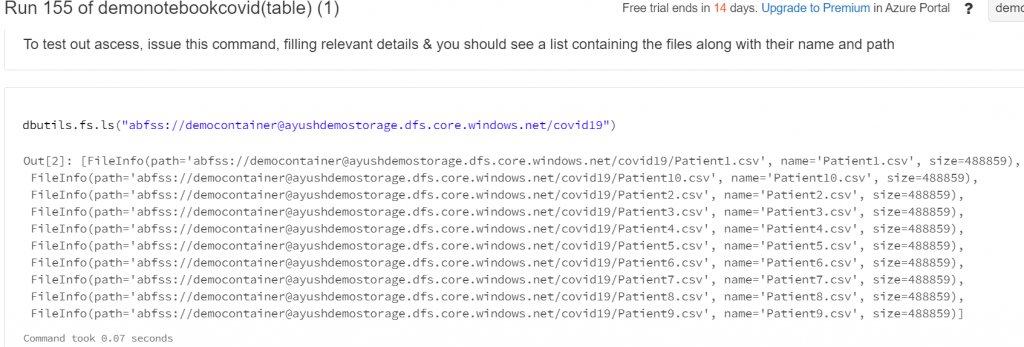
To test out access, issue the following command in a new cell, filling in your relevant details, and you should see a list containing the file you updated. Dbutils is a great way to navigate and interact with any file system you have access to through Databricks.
Load Data into a Spark Dataframe from the Data Lake
Next, let’s bring the data into a dataframe. You can think about a dataframe like a table that you can perform typical operations on, such as selecting, filtering, joining, etc. However, a dataframe exists only in memory. One thing to note is that you cannot perform SQL commands directly on a dataframe. First, you must either create a temporary view using that dataframe, or create a table on top of the data that has been serialized in the data lake.
To bring data into a dataframe from the data lake, we will be issuing a spark.read command.
You can issue this command on a single file in the data lake, or you can issue it on a path in the data lake. The second option is useful for when you have multiple files in a directory that have the same schema, you can fetch those files by putting ‘*’ sign at the end of that path.
We have specified a few options –
- We set the ‘InferSchema‘ option to ‘true’, so Spark will automatically determine the data types of each column.
- We also set the ‘header’ option to ‘true’, because we know our csv has a header record.
- Delimeter,it defines the character used to decimate the fields inside a record.When not defined the default value is comma.
- It was possible the multiple files that we have can be of different schemas, this is called, ’drift schemas’.So, to choose one type of schema while discarding the other type of schema, we have an option as ‘mode’ and set the value to ‘DROPMALFORMED’. This is key option which helps us to overcome the drift schema problem.
In a new cell, issue the printSchema() command to see what data types spark inferred:
Perform Transformation on the Data
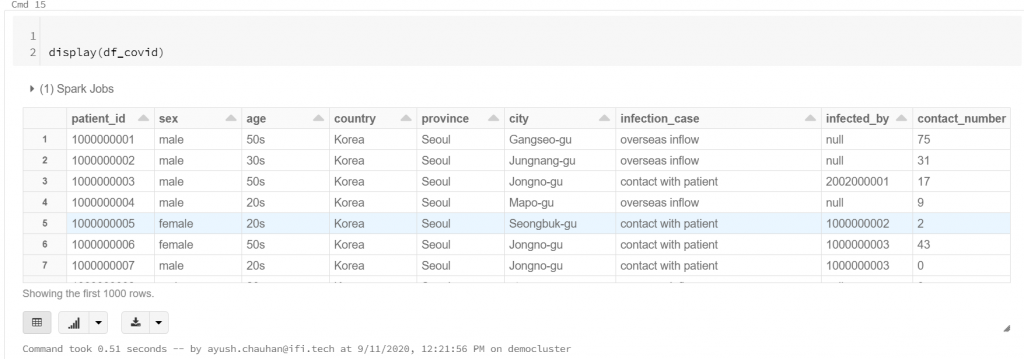
Display the data (by default it shows first 1000 rows), just get an idea about it before applying some queries on it.
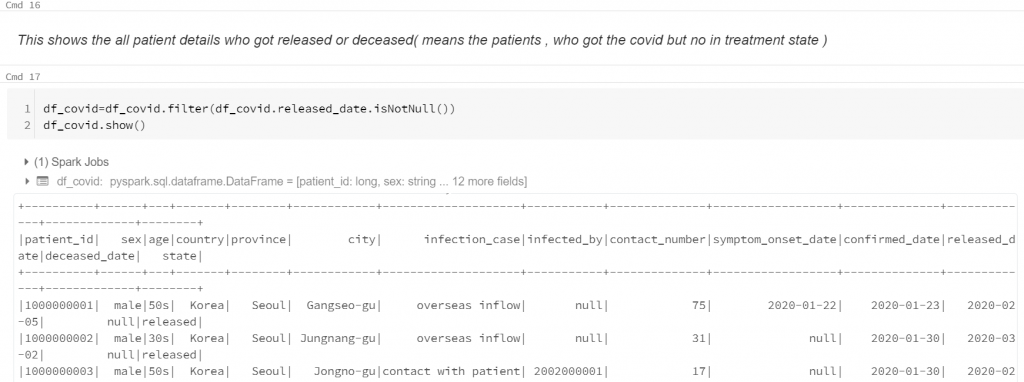
- Query to shows the all patient details who got released or deceased(means the patients, who got the covid but no in treatment state).
- This shows the total number of covid cases according to cities , respectively.
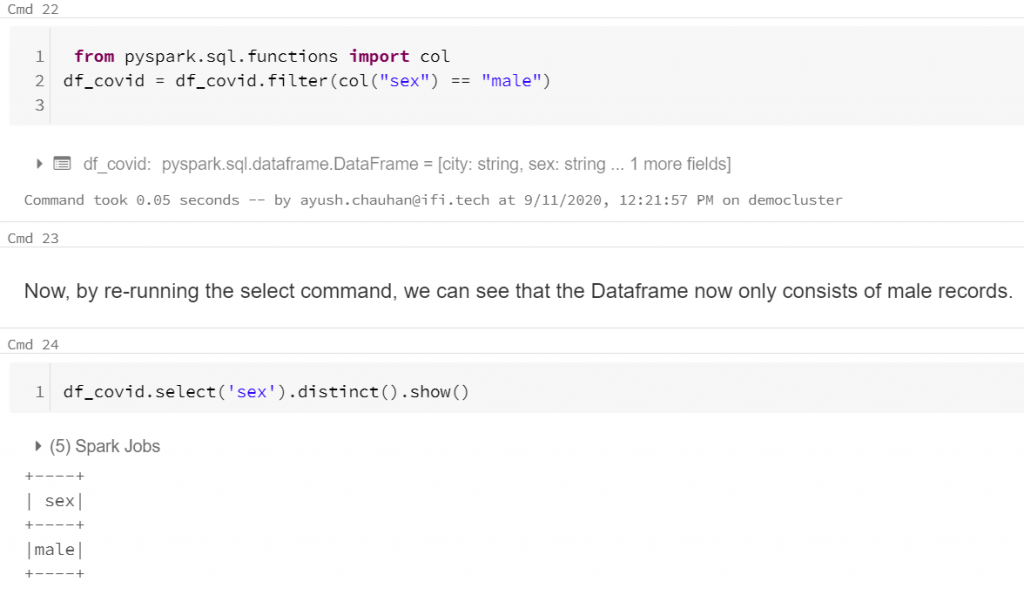
- Only fetching the data of male patients.
Write Transformed Data back to the Data Lake
Next, we can declare the path that we want to write the new data to and issue a write command to write the data to the new location:
You can specify different formats either text , CSV or Parquet to save the transformed file. Parquet is a columnar based data format, which is highly optimized for Spark performance.It is generally the recommended file type for Databricks usage.
The command will fail if there is data already at the location you want to write to. To avoid this, you need to either specify a new path or specify the ‘SaveMode’ option as ‘Overwrite’.Once you run this command, navigate back to storage explorer to check out the new data in your data lake:
You will notice there are multiple files here. The files that start with an underscore are auto generated files, written by Databricks, to track the write process. The file ending in.snappy.parquet is the file containing the data you just wrote out. A few things to note:
- You cannot control the file names that Databricks assigns – these are handled in the background by Databricks.
- Snappy is a compression format that is used by default with any files in Databricks.
- If you have a large data set, Databricks might write out more than one output file. This is dependent on the number of partitions your dataframe is set to.
- To check the number of partitions, issue the following command:
One can also do multiple things, like we you want merge the all partitions into a single file than, follow below command:
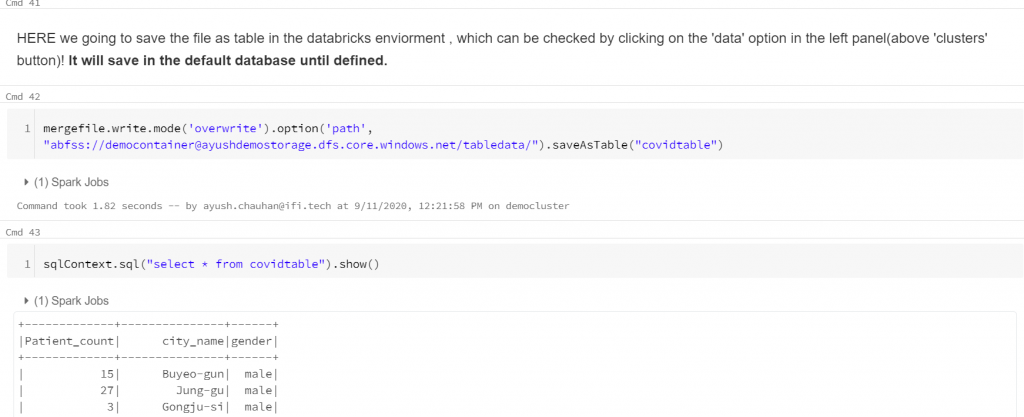
You can also save this partition or transformed file as a table in the data bricks itself (will save into default database).
Write Transformed Data back to a database
The following code sets various parameters like Server name, database name, user, and password.

The below code creates a JDBC URL. We will use sqlContext() to read the file and new data frame is created as shown in the screenshot below.
We will import the panda’s library and using the DataFrameWriter function; we will load data into a new dataframe named mydf. And finally, write this data frame into the table covid19 for the given properties. In case, this table exists, we can overwrite it using the mode as overwrite.
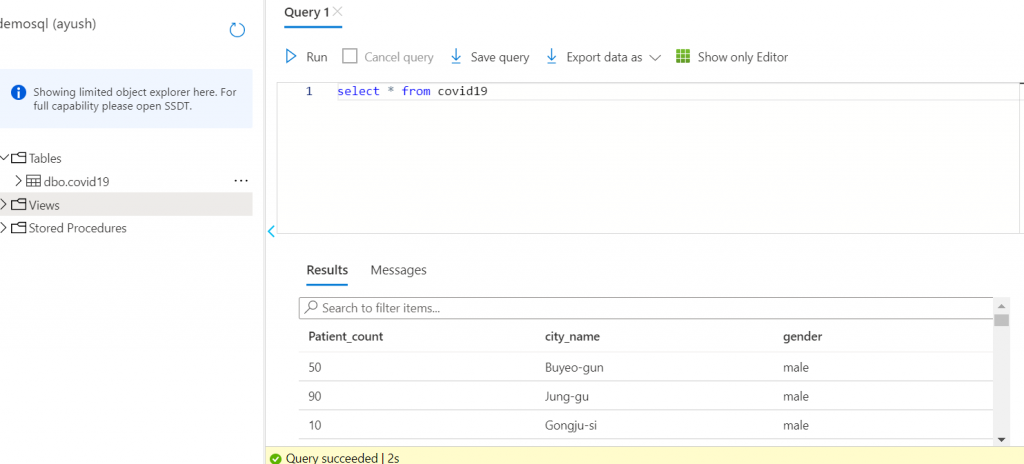
Go to Azure Portal, navigate to the SQL database, and open Query Editor. Open the Tables folder to see the data successfully loaded into the table Covid19 in the Azure SQL database, demosql.
Data brick Job Scheduling
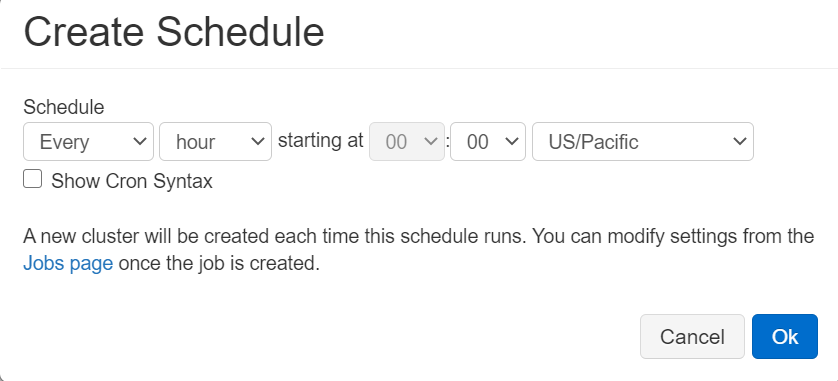
What happens if our storage account encounter some new files, then we have to run every other command for every other time when a new file will be in our directory. To avoid this, we will automate the whole process and schedule a job to run our notebook with some interval, so it will check for a new file and apply all the commands accordingly.
- Click on (calendar like symbol) , on the top-right corner of your notebook.

- Click on ‘+New’ button.
- Schedule a job according to your need and then click ’ok’.
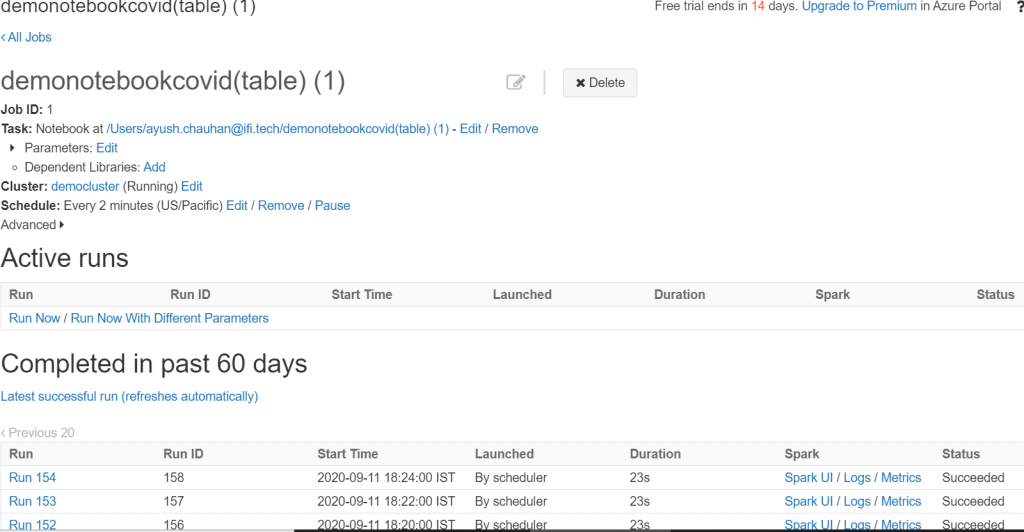
In the end of this , go back the job to check the status of your(either be succeeded or failure) runs, it will look something like below in the picture.
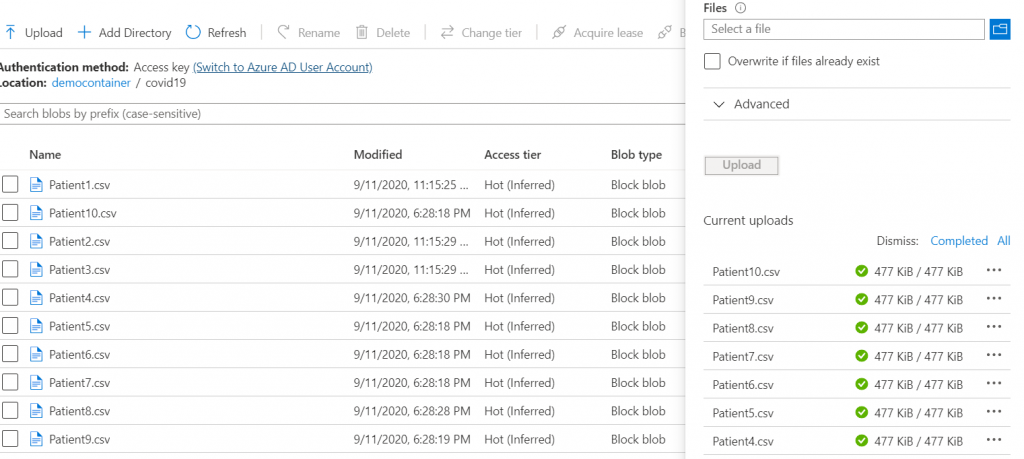
If you add some more data into our storage account, then it will automatically fetch the new files. Uploading new files.
Now, go back to the scheduler and check the latest successful job to check the results.
This is the end of this article, we successfully automate the process of Loading, Transforming and Writing the data process from a storage account gen2 to same location and different other location (azure database), it will also read new files and apply all the transformations on it with an interval that was defined by the developer.
Thank you and feel free to try out some different transformations and create some new tables in the refined zone of your data lake!


