Author – Akash Roy , Cloud Engineer
Ever wondered how your phone recognizes your face and unlocks the phone? Microsoft’s Azure Cognitive Services gives you an opportunity to make a face detection software/code on your own and detect faces in a group picture and recognise your face when you open an application with a Hello message.
In Face recognition API services, the API detects the human face and returns a rectangle coordinates of their locations over the faces in the group picture.
Using Face API, you can extract a lot of facial features, such as the age of the person, head pose, expressions, facial hair, glasses etc.
Pre-Requisites
Face API can be accessed using the SDKs and REST APIs. In order to create an Azure Face API, you need to have a cognitive service resource on the Azure portal.
Once you have created a Face API resource group, you then need to acquire the keys and the endpoint which you will use to connect the face API to the visual studio
If the user doesn’t have the Azure subscription, then he/she can get an Azure subscription under a trial period which lasts for 30 days.
Working of Face API
Azure Face API uses 3 different APIs that help it in recognising the faces in a photo. They are:
- Verify API
- Group API
- Identity API
Verify API: It is used to identify the faces in an image. It uses 39 Face points to determine where the eyes, nose and lips are. It also uses these points to determine facial expressions such as sadness, anger, happiness etc.
Group API: It compares if the image detected is repeated in the image, if not then it returns it as a new face. This helps in making sure two same faces does not get recognized as 2 different faces/persons, instead, they should be recognized as 1 face/person.
Identity API: It identifies the face and runs it against the database to help recognise the person. The database can be provided with the facer and the names manually and then the API will use this to determine the person in an image.
Getting Started with Azure Face Recognition API
1. Connect the Face API to your Visual studio
In order to make an azure face recognition code, you need to integrate the Azure Cognitive Service (Face API) with the Visual Studio. This can be done by using the keys provided in the resource group and using the endpoint to connect.
2. Use either the client SDK or REST API to use the API
You can write the code in a lot of languages such as Python, C#, Ruby etc. In order to so, you have to create a WPF(Windows Presentation Foundation) or a web application which will allow you to upload a photo and will return with a rectangular box over the faces of the people/faces detected.
3. Display the attributes of the detected face
You can use the FaceAttributes class to extract the attributes of a detected face. The data obtained will be in JSON format and will have to be converted into a string format.
Applications
Face API has a lot of benefits that can help in the media industry, these are:
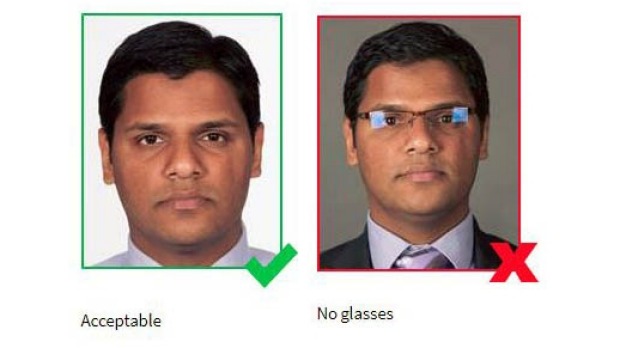
- Passport Photo App: For a passport photo it is required that the head pose should be straight and there shouldn’t be any glasses/ Makeup. Using Face API and by extracting the data we can determine if the passport photo is eligible to be put on the passport or whether they must take the photo again
- Facial Blur: With the help of face API, we can blur out the faces of the children for the apps that put the photos out in the public or uses the photo for a different purpose. This will eliminate the risk of exploitation by any criminal party.
- Photo Filters: We can use Face API to create face filters that the teens have been using. Snapchat uses such a method to create new filters
To know more about the pricing of Face API, check the pricing documentation
For additional reference, do check the documentation.
Interested in Microsoft Azure, Let’s CONNECT!


