Author: Ayush Tiwari (Associate Data Engineer)
In this article, we will be using Azure DMS Hybrid for online/offline database migration from On-Premise to Azure Managed Instance.
Prerequisites:
1. Azure Subscription.
2. One SQL VM (Create using the azure portal).
3. Create new App Registration for our DMS.
4. In Azure Data Migration Service create a new DMS Hybrid.
5. Create a new role assignment at Subscription Level >>Access Control (IAM) >>add role assignment.
6. Create a new role assignment at Resource Level >>Access Control (IAM) >>add role assignment.
7. The Azure Database Migration Service hybrid installer requires .NET 4.7.2 or later.
Procedure:
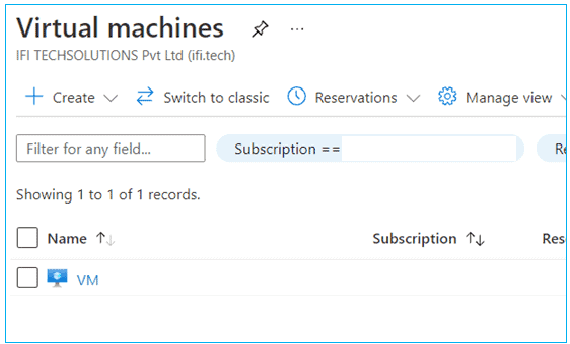
Step1: Sign in to Azure Portal, Create a Virtual machine. (Virtual Machine Name: VM)
From here we will do all the steps on Virtual Machine (VM).
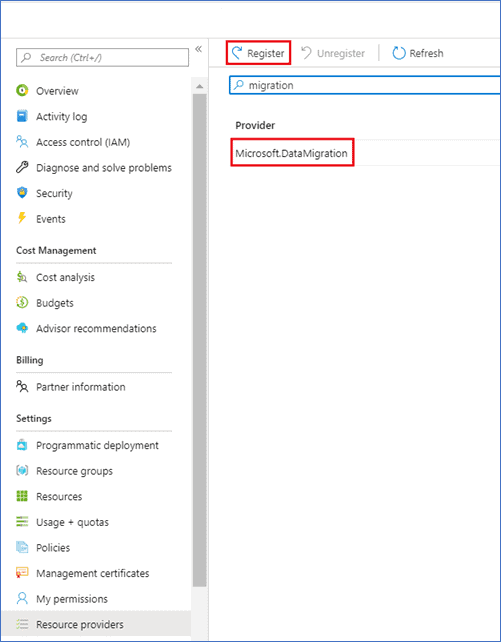
Step 2: Look for Resource providers, search for migration, and then register Microsoft.DataMigration.
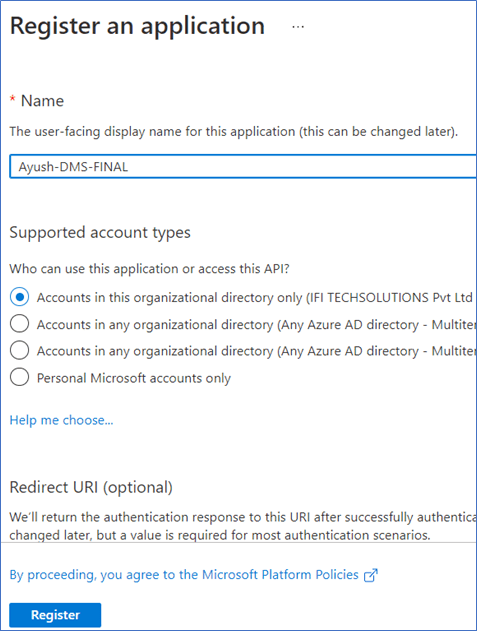
Step3: Create Azure App registration ID:
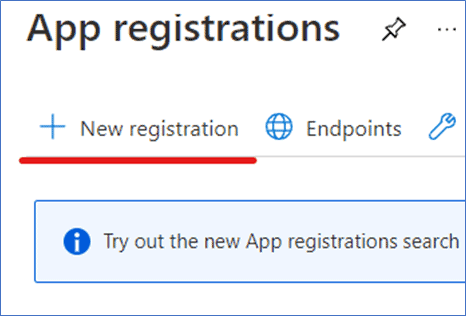
- In the Azure portal,Select Azure Active Directory-> App registrations-> New registration-> Register.
2. Specify a name for the application, and then, under Supported account types, select the type of accounts to support to specify who can use the application.
3. Use the default values for the Redirect URI (optional) fields, and then select Register.
4. After App ID registration is completed, make a note of the Application (client) ID, which you’ll use while installing the hybrid worker.
Step 4. In the Azure portal, Go to your subscription,
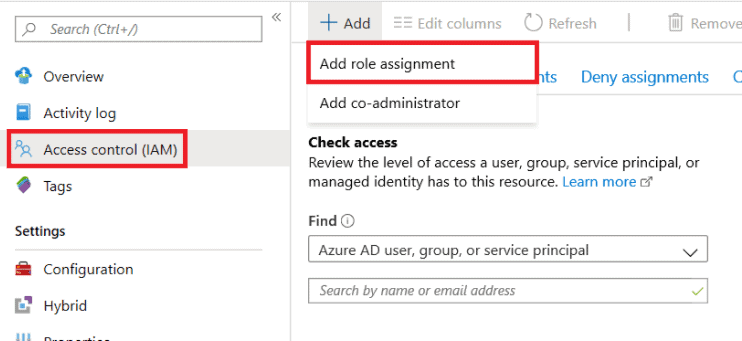
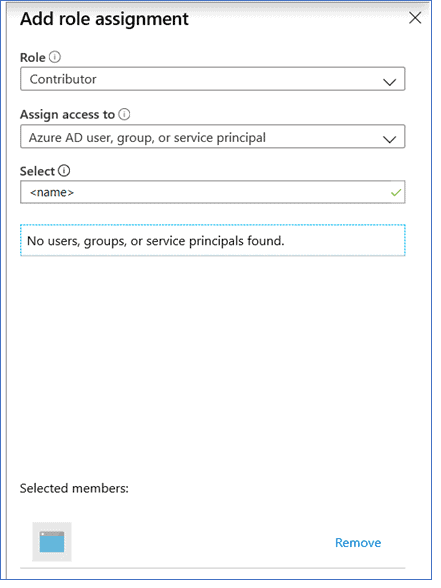
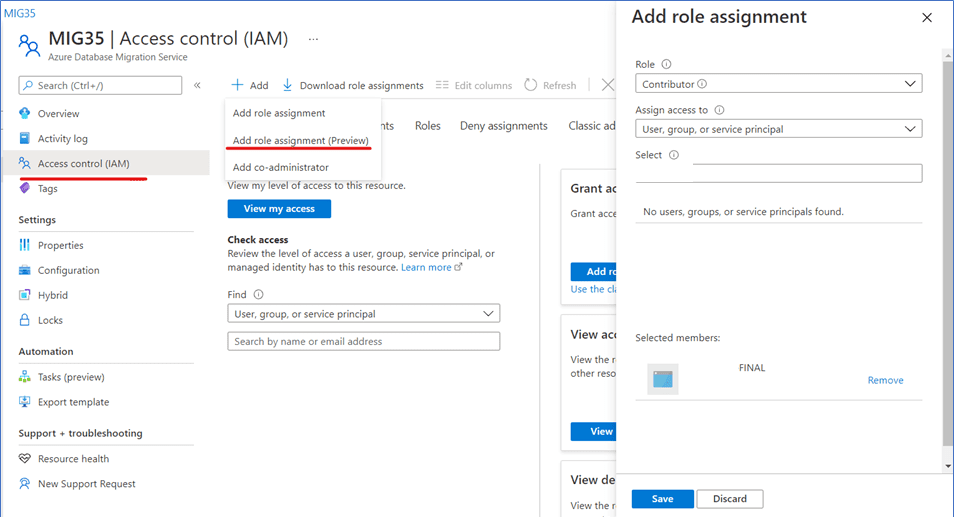
Select Access control (IAM)-> Add role assignment-> Contributor access to the App ID-> Save.
Select Contributor as the role, assign access to Azure AD user, or service principal, and then select the App ID name.
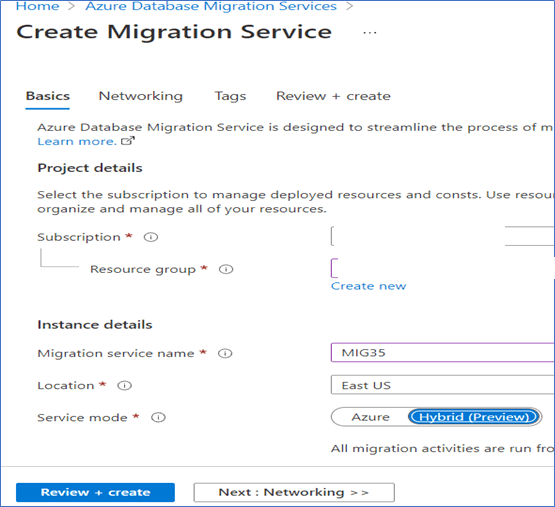
Step5: Create an instance of the service:
Search Azure Database Migration Service select on Azure Database Migration Service and then select Create
- Choose a Service Name that is memorable and unique to identify your instance of Azure Database Migration Service.
- Select the Azure Subscription in which you want to create the instance.
- Select an existing Resource Group or create a new one.
- Choose the Location that is closest to your source or target server.
- For Service mode, select Hybrid (Preview).
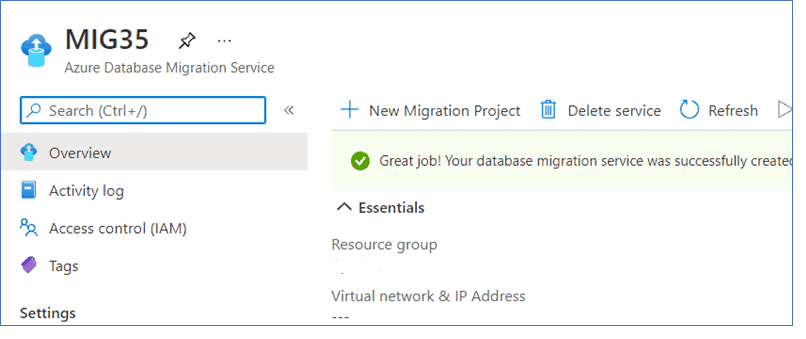
After a few moments, your instance of Azure Database Migration Service in hybrid mode is created and ready to set up. The Azure Database Migration Service instance displays as shown in the following image:
Step 6. In the Azure portal, navigate to Azure Database Migration Service,
Select Access control (IAM)-> Add role assignment-> Contributor access to the App ID-> Save.
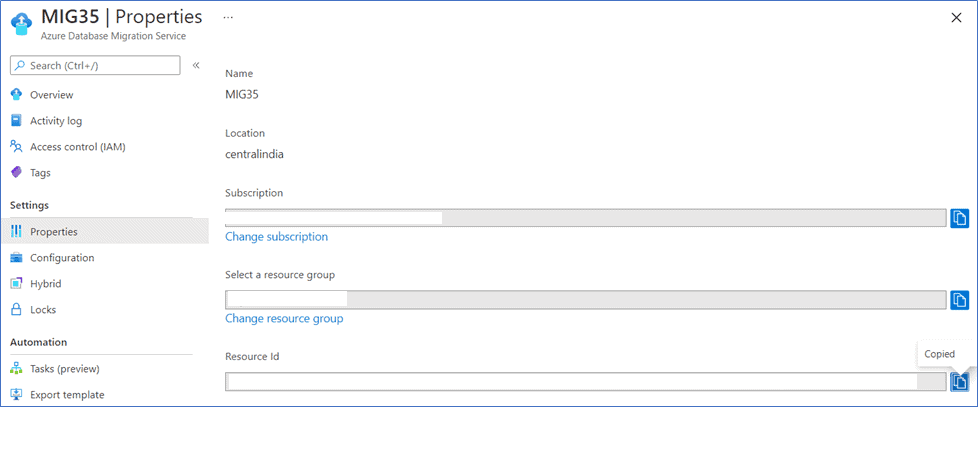
Step 7. Select Properties, and then copy the value displayed in the Resource Id box.
Step 8. Download and install the hybrid worker:
In the Azure portal, navigate to your instance of Azure Database Migration Service.
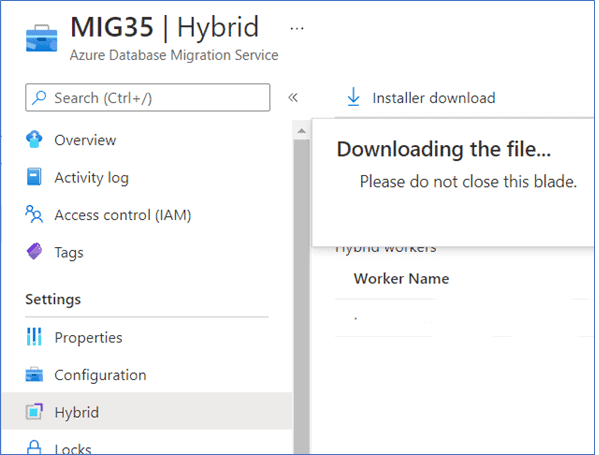
Under Settings-> Hybrid-> Installer download.
- Extract the ZIP file on the server that will be hosting the Azure Database Migration Service hybrid worker.
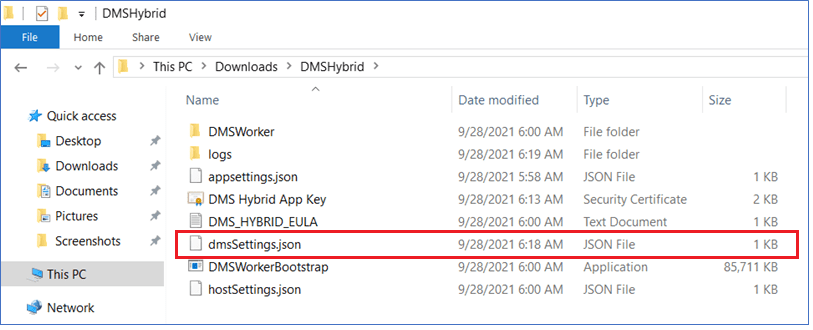
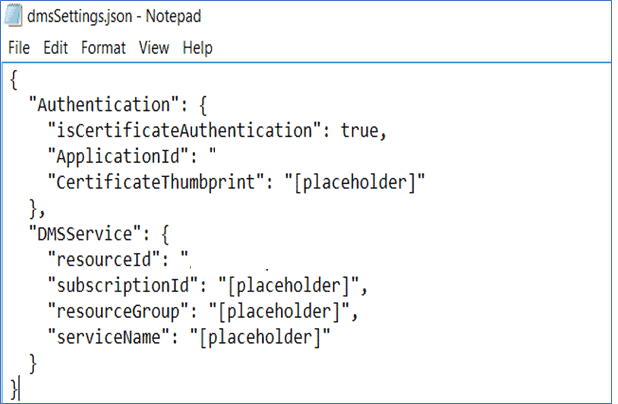
- In the install folder, locate and open the dmsSettings.json file, specify the ApplicationId and resourceId, and then save the file.
Step 8.1 Generate a certificate that Azure Database Migration Service can use to authenticate the communication from the hybrid worker by using the
following command.
Open cmd as administrator and open the path where your extracted DMS file
cd C:\Users\ayushtz\Downloads\DMSHybrid
Generate a certificate using the following command:
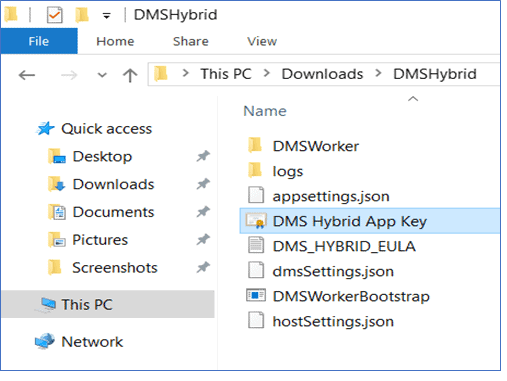
DMSWorkerBootstrap.exe -a GenerateCert
A certificate is generated in the Install folder.
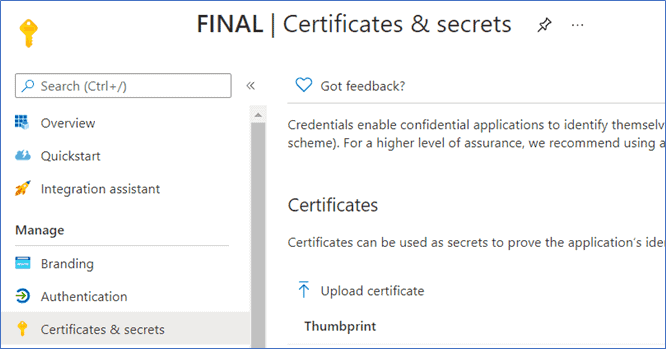
Step 8.2 In the Azure portal, navigate to the App ID,
Under Manage-> Select Certificated & secrets-> Upload certificate
Step 8.3 Install the Azure Database Migration Service hybrid worker on your on-premises server by running the following command:
DMSWorkerBootstrap.exe -a Install -IAcceptDMSLicenseTerms -d
If the installer runs without error, then the service will show an online status in Azure Database Migration Service and you’re ready to migrate
your databases.
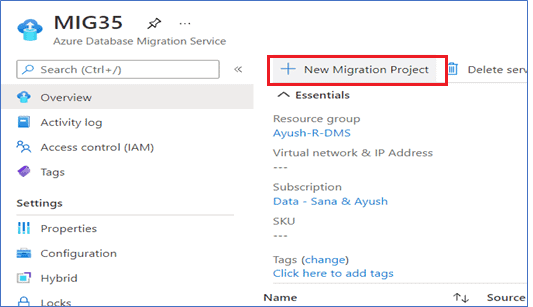
Step 9. Create a New Migration Project from the tab on the DMS Service:
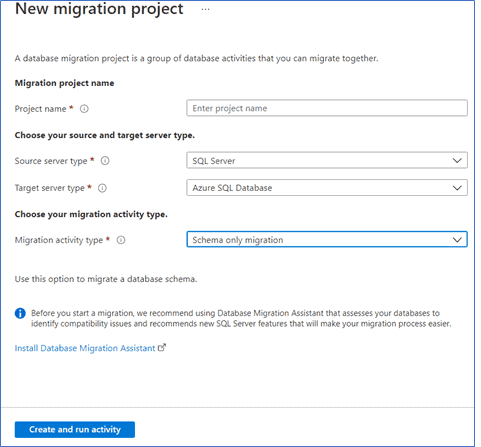
Enter Project Name > choose the type of activity > Online Data Migration
Now Enter Source and Destination
Source: SQL Server,
Destination: Azure SQL DATABASE,
Migration Activity Type: Schema Only Migration.
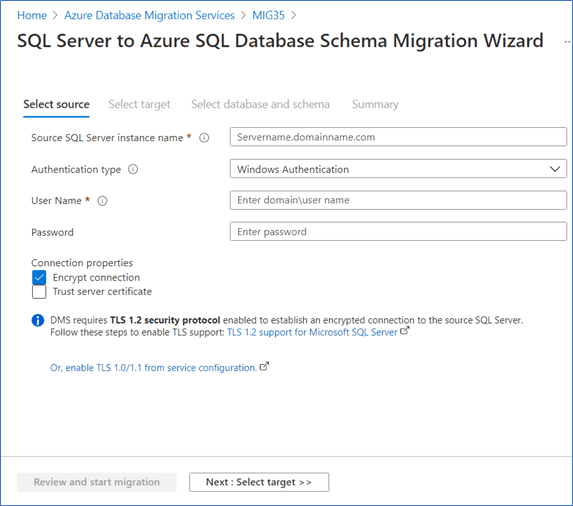
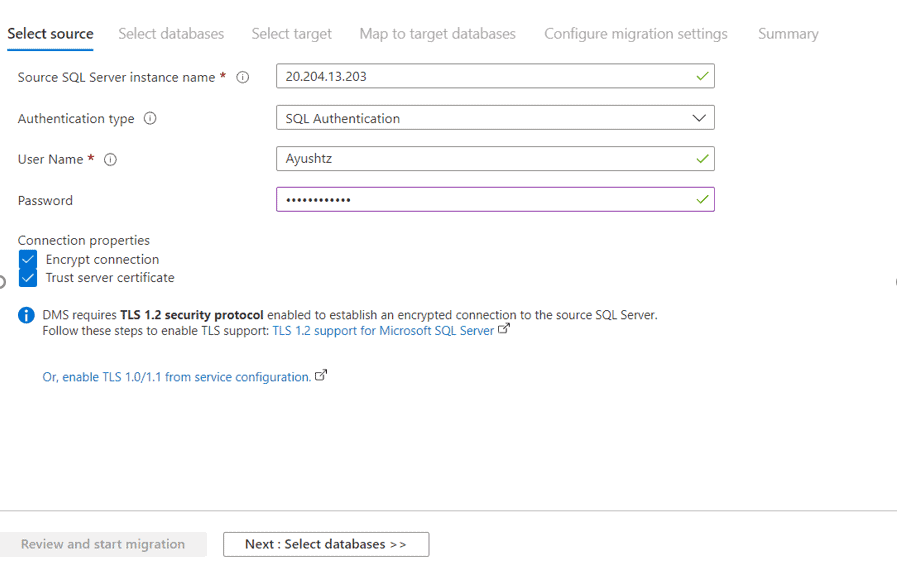
Step 9.1 In Select Source enter the details and tick both checkboxes. Encrypt connection and Trust certificate
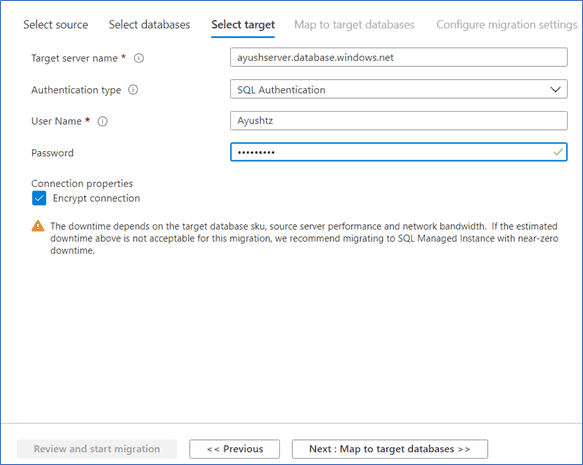
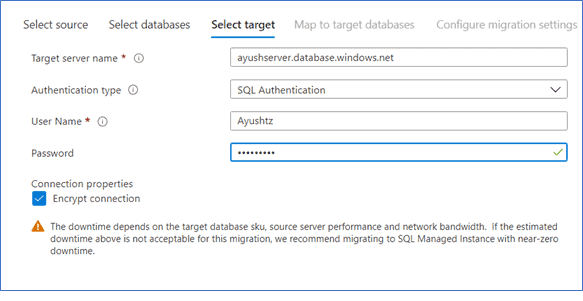
Step 9.2 Now enter the target server details
Step 9.3 Click on Select database and schema
On Select database and Schema page: Select source database and target database and on Schema source select Generate from Source.
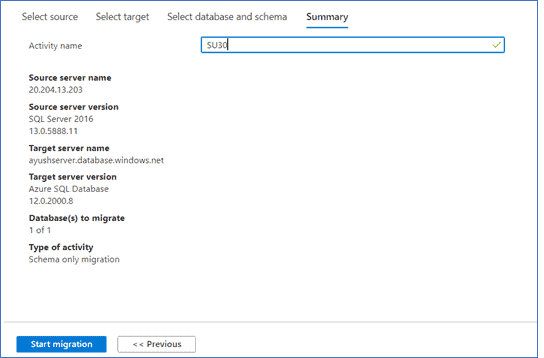
Step 9.4 Click on Next: Summary >>
And give the Activity Name (SU30). Click on start migration.
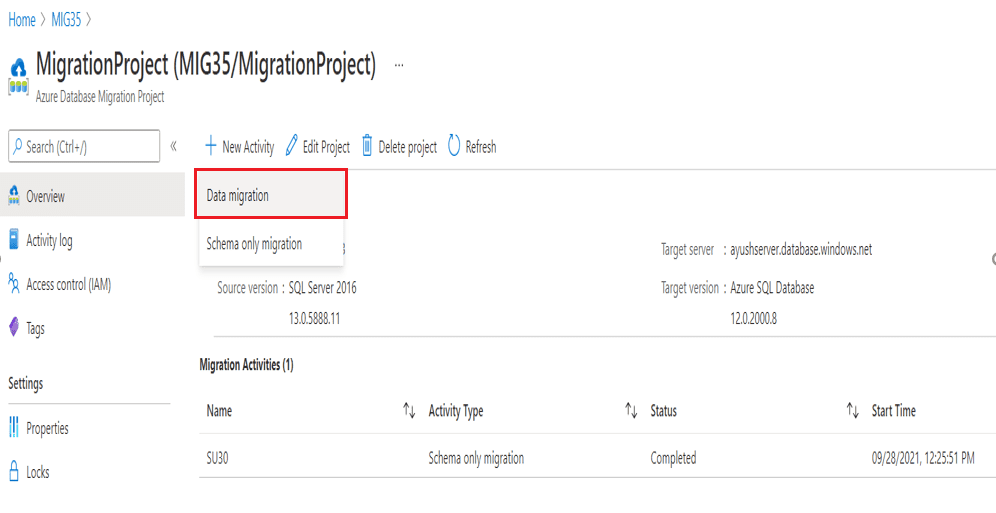
Step 9.5 After that create a new activity within that Migration Project create a New activity: Data migration
Step 9.6 Enter Select source details.
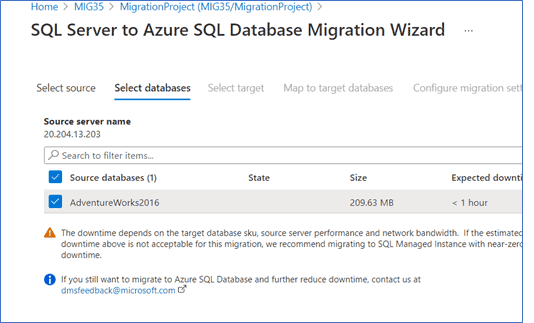
Step 9.7 Now select the database from the source location for the migration.
Step 9.8 Now enter the details for the target server.
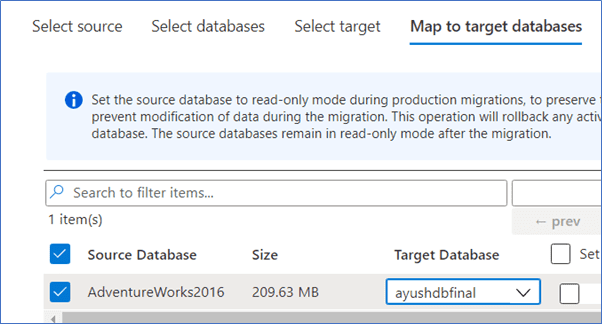
Step 9.9 Now select the Target Database from the dropdown list. And leave the checkbox Set Source DB Read-Only empty.
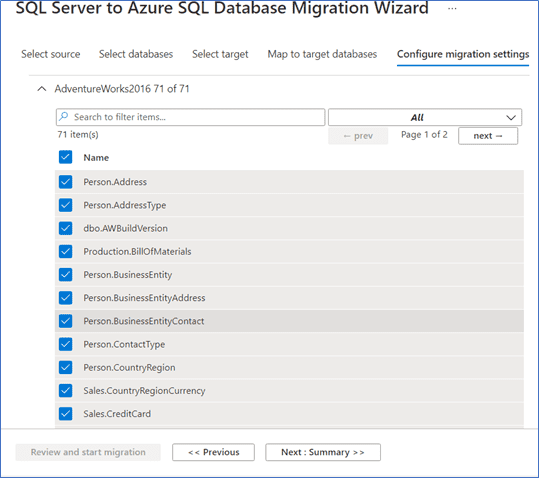
Step 9.10 Now here you can select all the tables for migration or only one table.
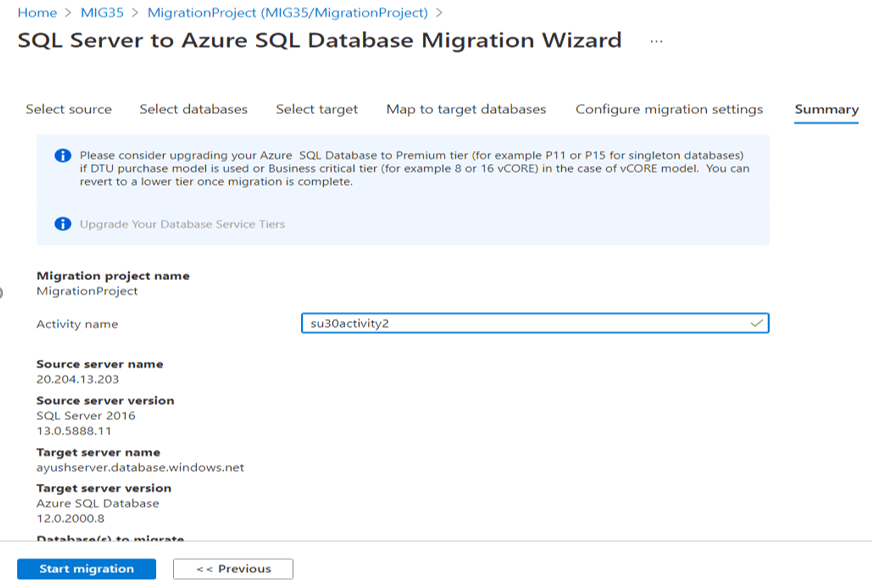
Step 9.11 Now give the Activity Name, and then click on Start Migration it will take some time to complete.
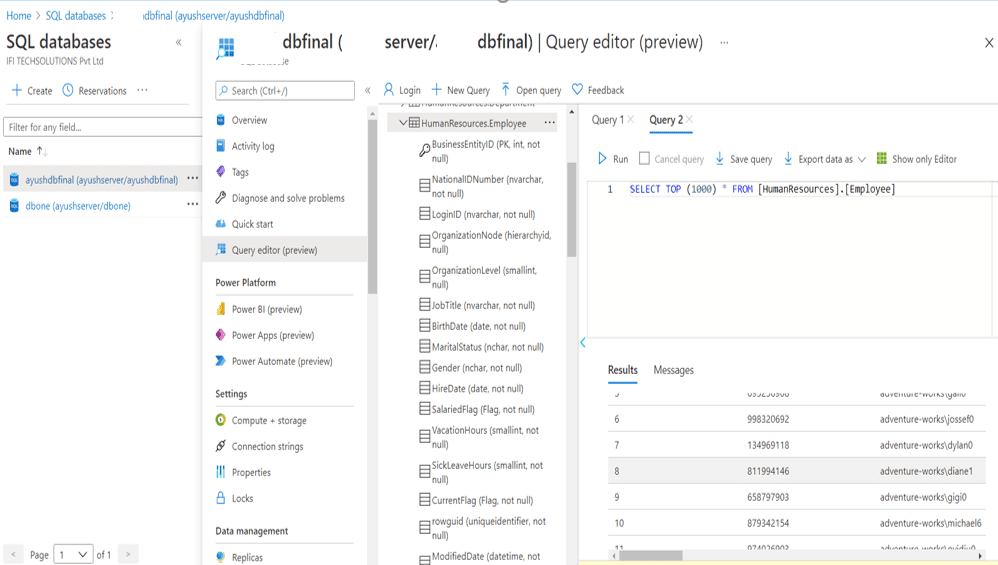
Step 10. Go to target Azure SQL Database and check if the data is migrated or not.
From the above image, we can see that our data is migrated successfully.
