Author – Shefali Kamble, Cloud Engineer.
Microsoft has introduced the limited public preview of Azure Disk Backup, this new option has been made available as a public preview (in limited regions) which is a great option and can help far most as a backup solution for managed disks.
What is Azure Disk Backup?
Azure Disk Backup is a secure and cost-effective cloud-based solution that enables you to configure protection for data in the managed disk. It is an agent-less and crash-consistent backup solution that takes point-in-time backup of a managed disk using incremental snapshots with support for multiple backups per day. Being an agent-less solution, it doesn’t have any impact on the performance of the production application. Azure Disk Backup supports backup and restore for both OS and data disk regardless of whether they are attached to a Virtual Machine or not.
Azure Disk Backup is integrated into Backup Center which provides a single unified management experience in Azure for enterprises to govern, monitor, operate, and analyze backups at scale.
Let’s see it in practical how to backup Azure Disk from Azure portal
In a web browser, navigate to the Azure portal
Following are the steps that needs to be followed:
- Create a Backup Vault
- Create Backup policy
- Configure backup of an Azure Disk
- Run an on-demand backup job
Step 1. Create a Backup Vault: A Backup vault is a storage entity in Azure that holds backup data for various newer workloads that Azure Backup supports, such as Azure Database for PostgreSQL servers and Azure Disks.
- Sign in to the Azure Portal
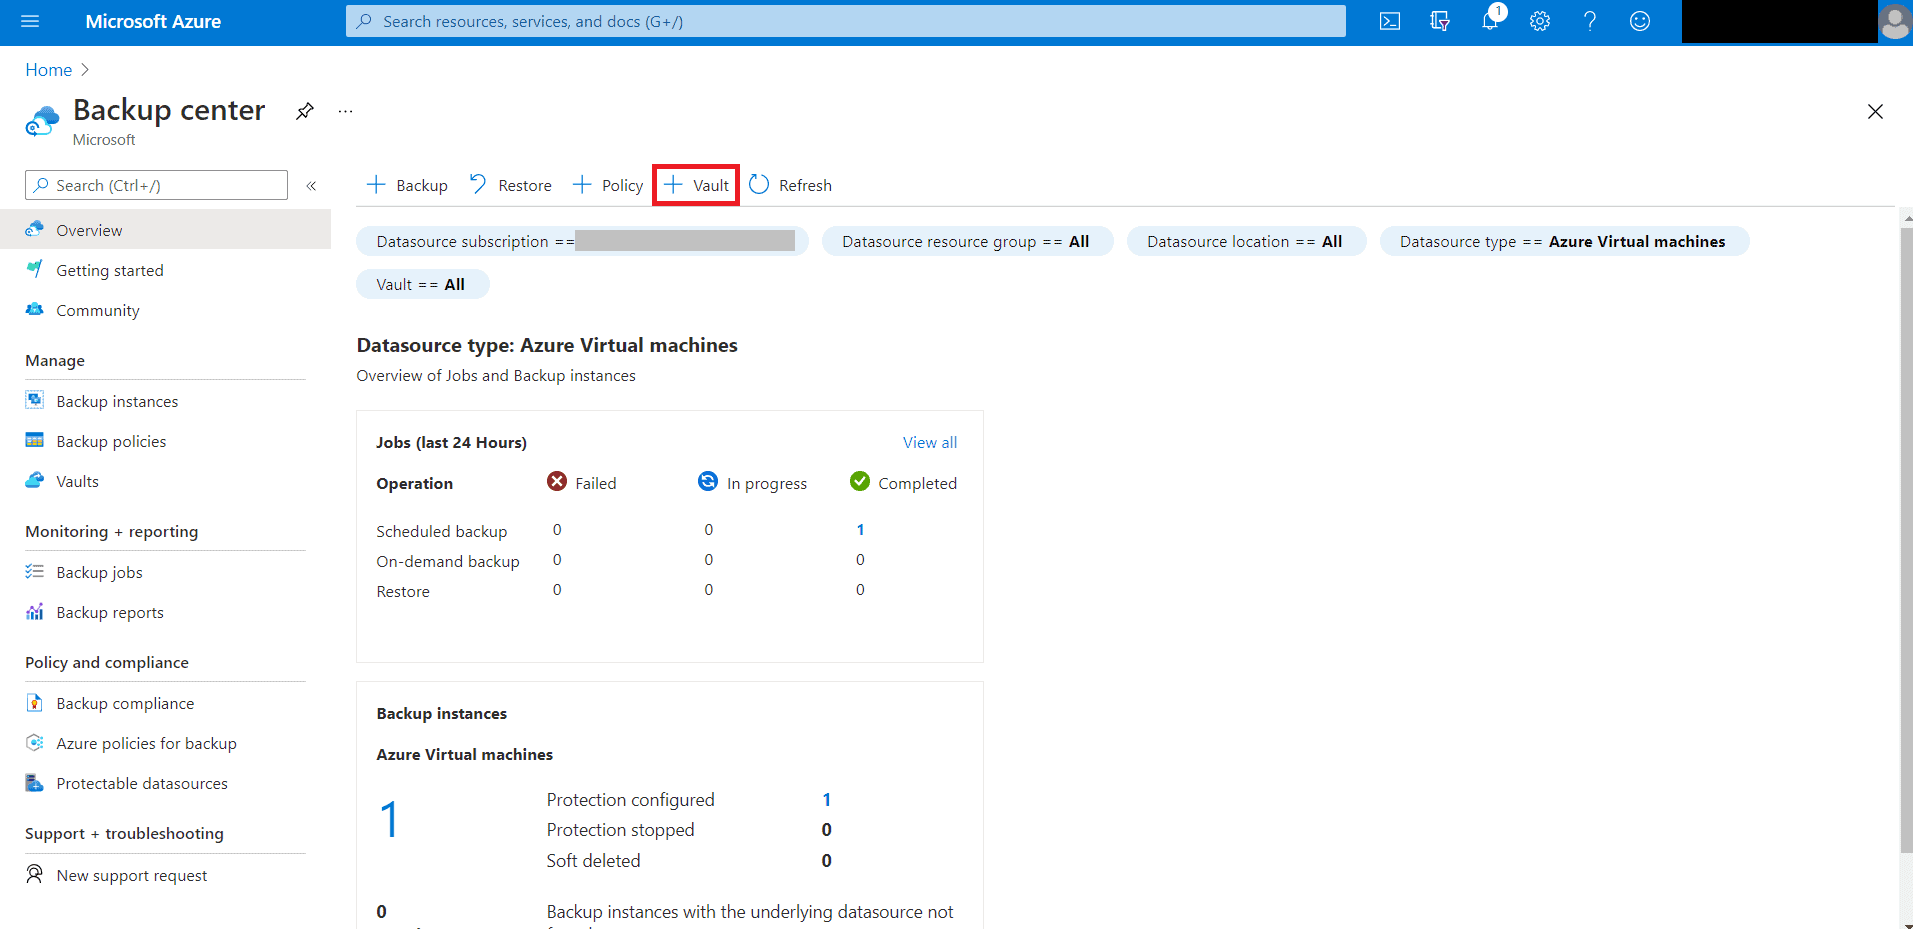
- Search and select Backup Center from the search box
- In the Backup center page select Vault
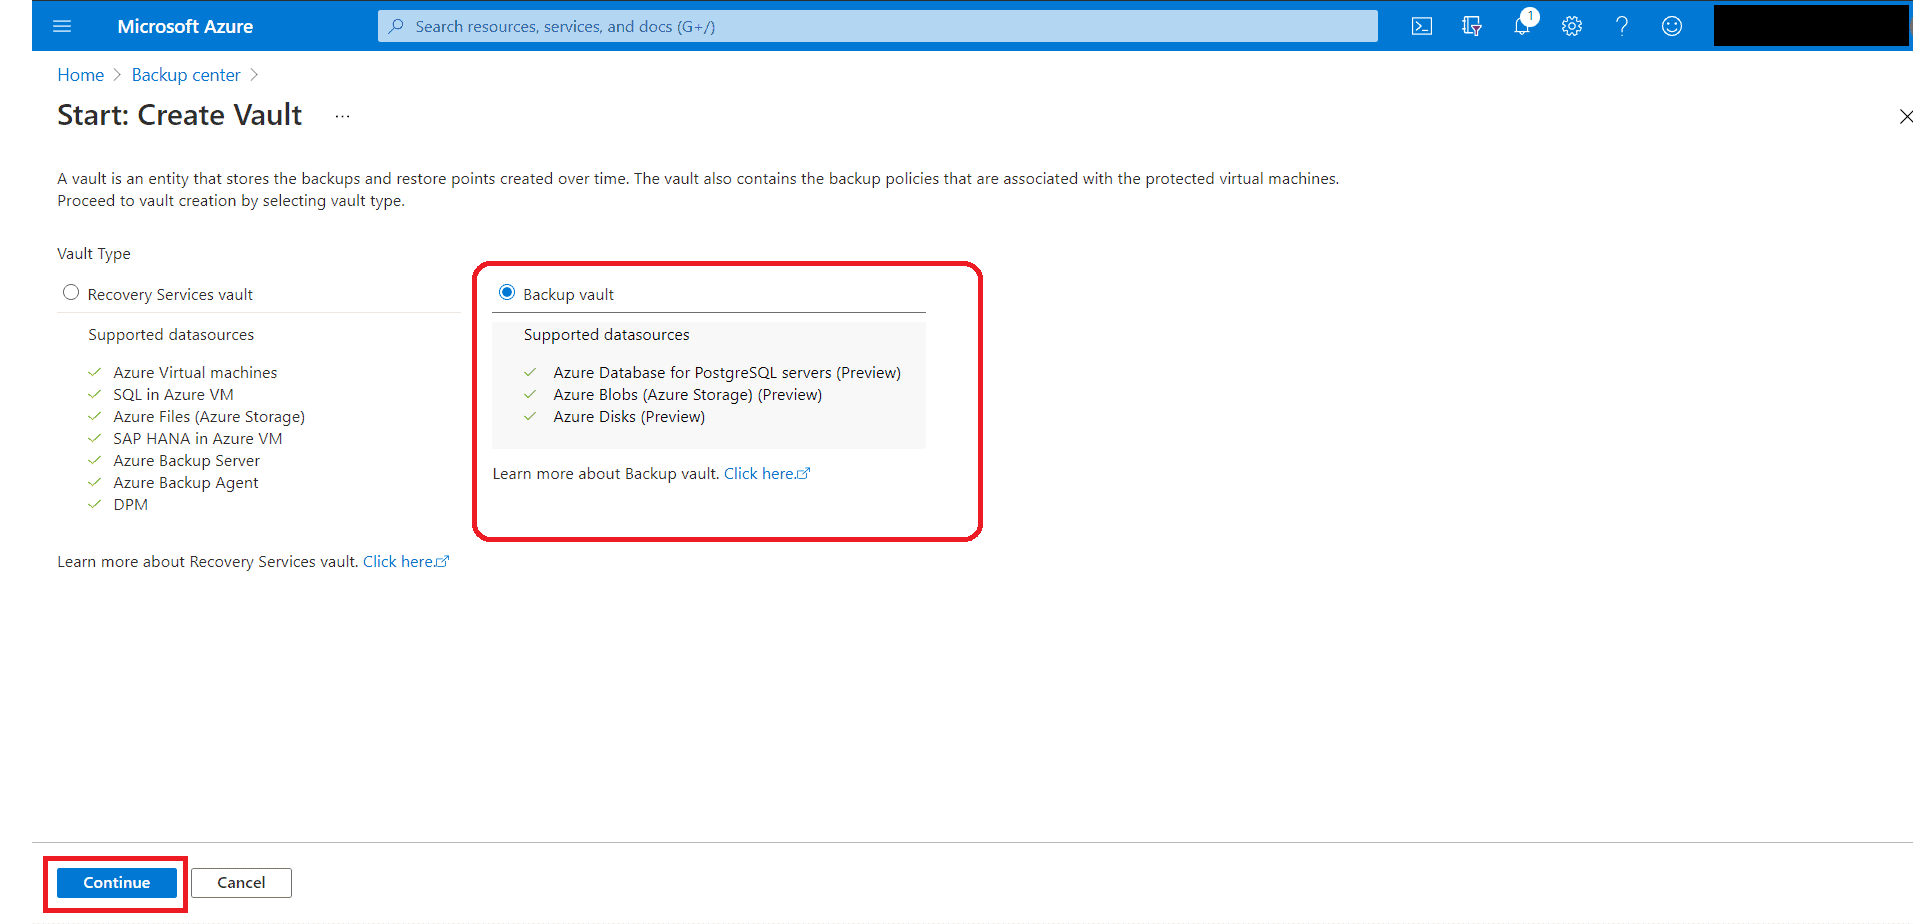
 In the Create Vault page, select Backup Vault as the Vault Type and Click on Continue
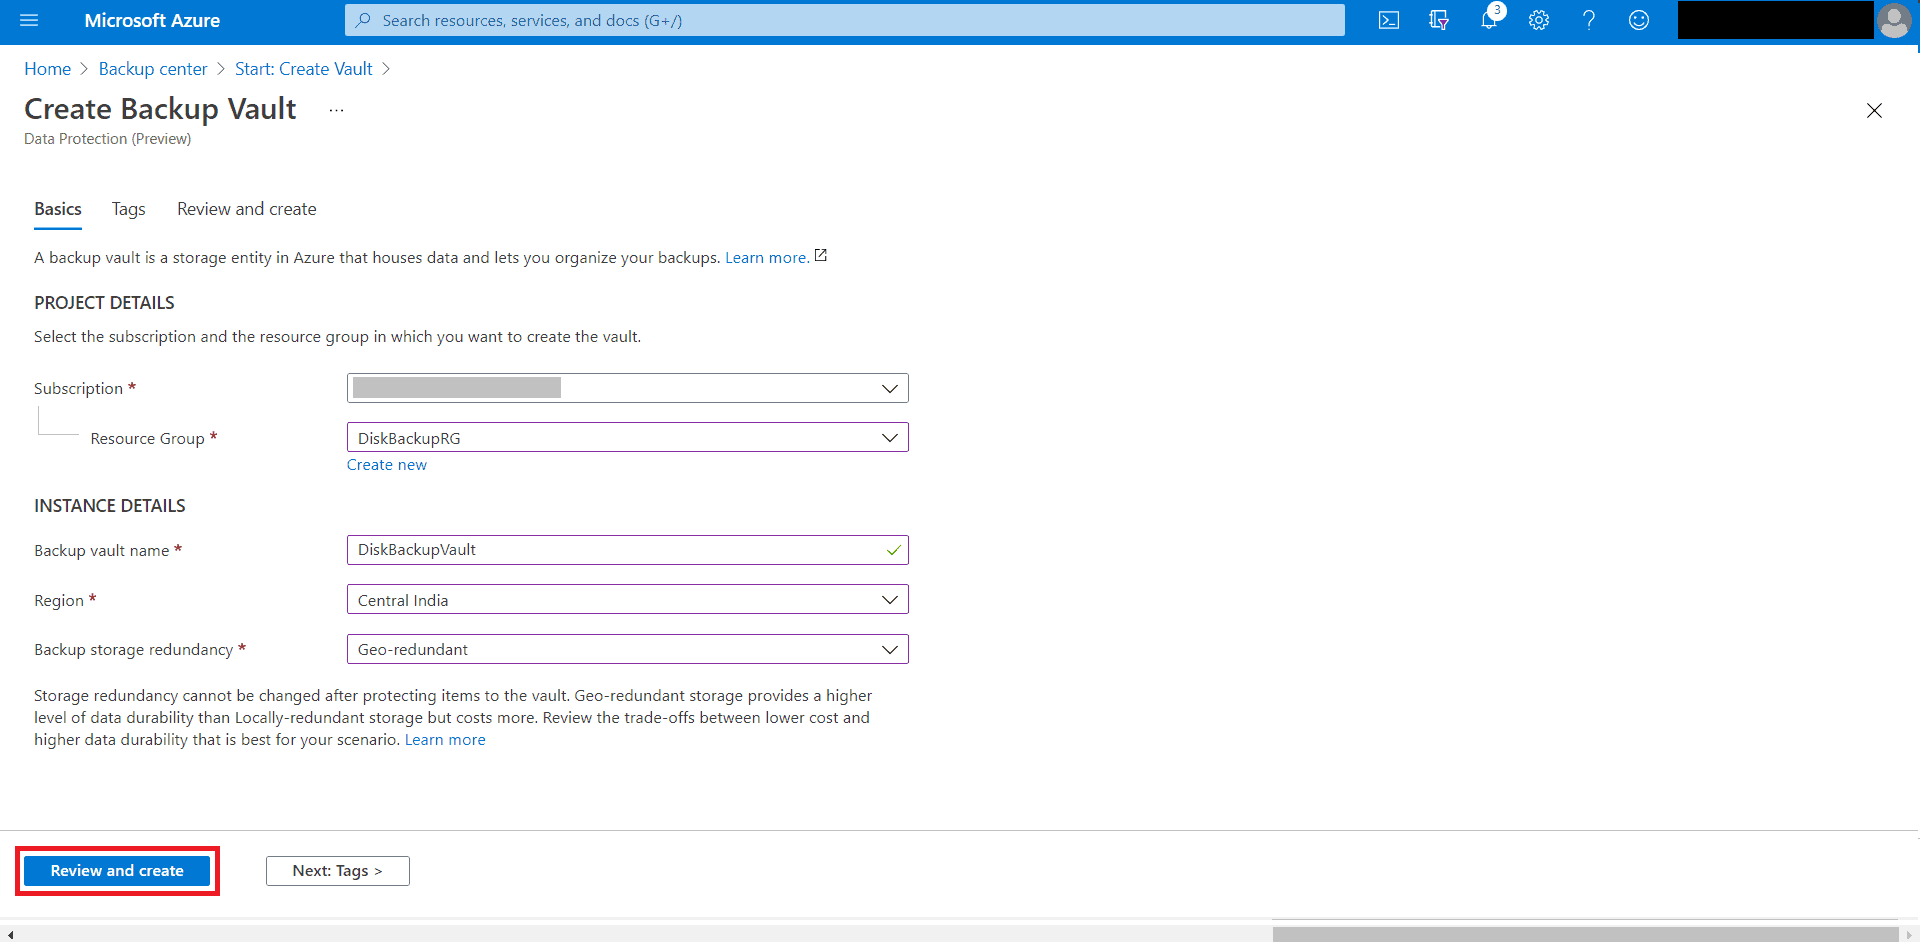
 Fill in all the details regarding the subscription, resource group (can use existing or create a new), backup vault name, region (according to your requirement), backup storage redundancy (Locally-redundant, geo-redundant). Click on Review and Create
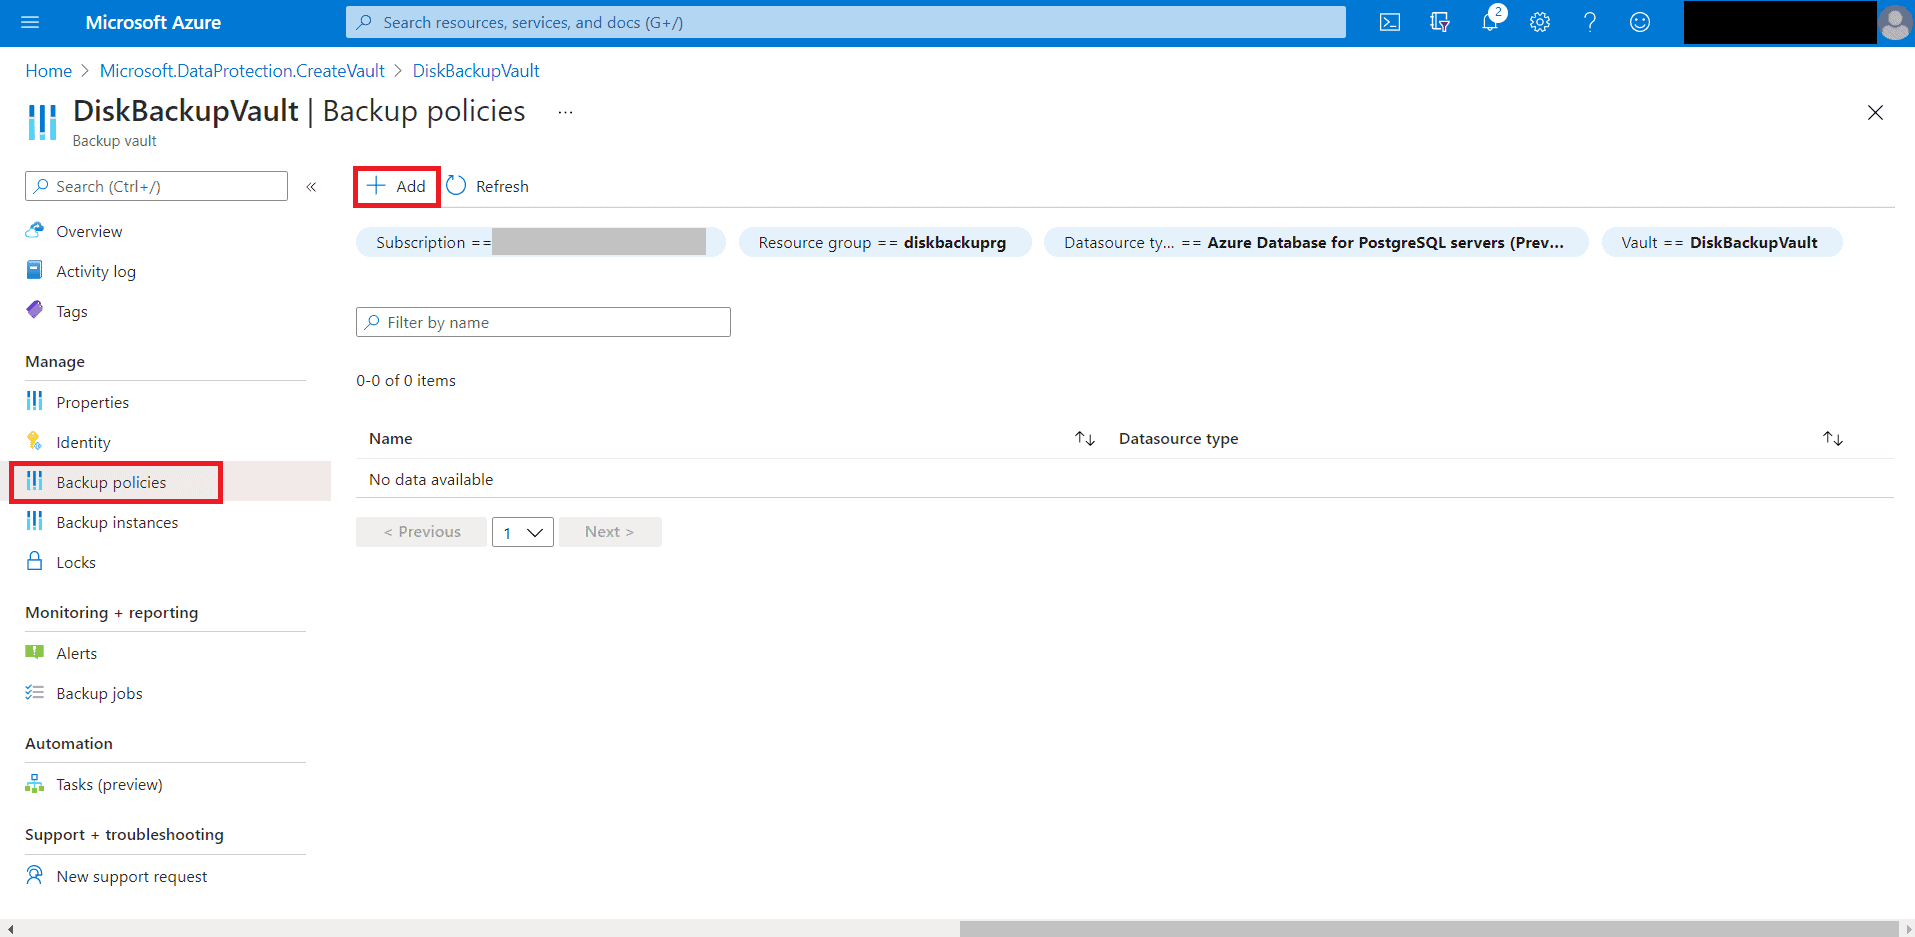
Step 2. Create Backup Policy
- Navigate to the Backup Vault that we created in the previous step, select Backup policies and click
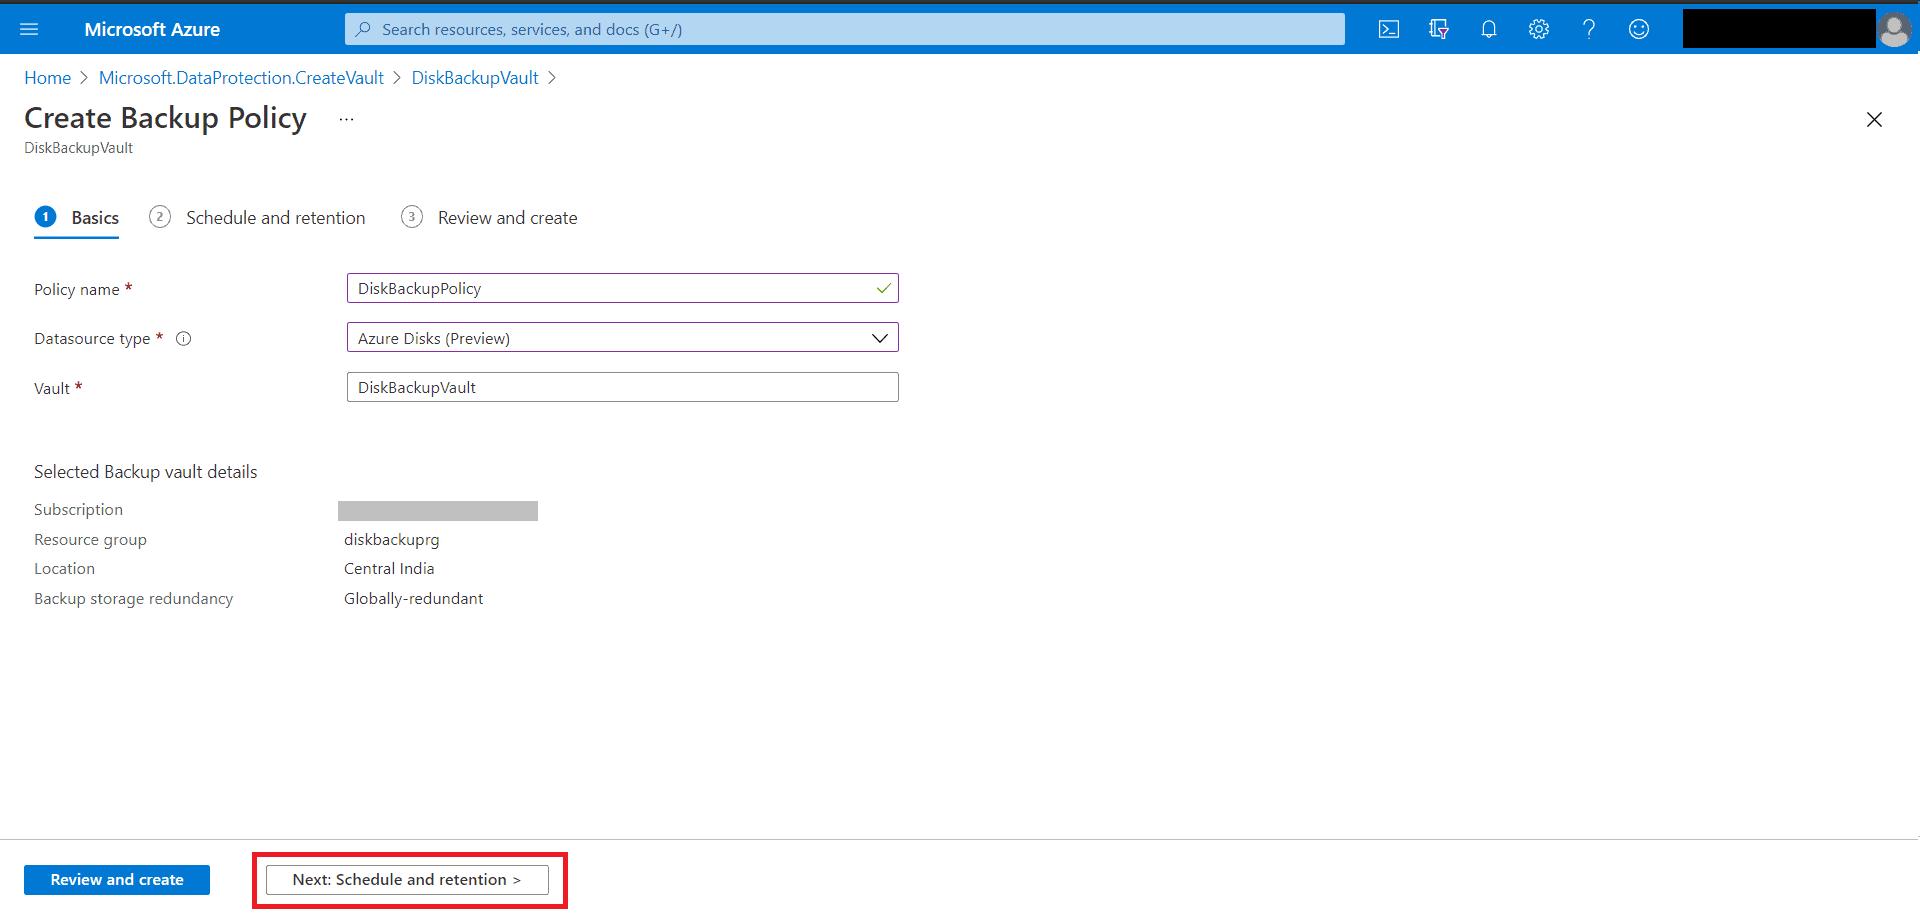
 In the basics tab fill in the details. Give a name to the policy, for the Datasource type select Azure Disks from the drop down, the vault we created will appear automatically. Verify all the Backup Vault details and click on Schedule and Retention.
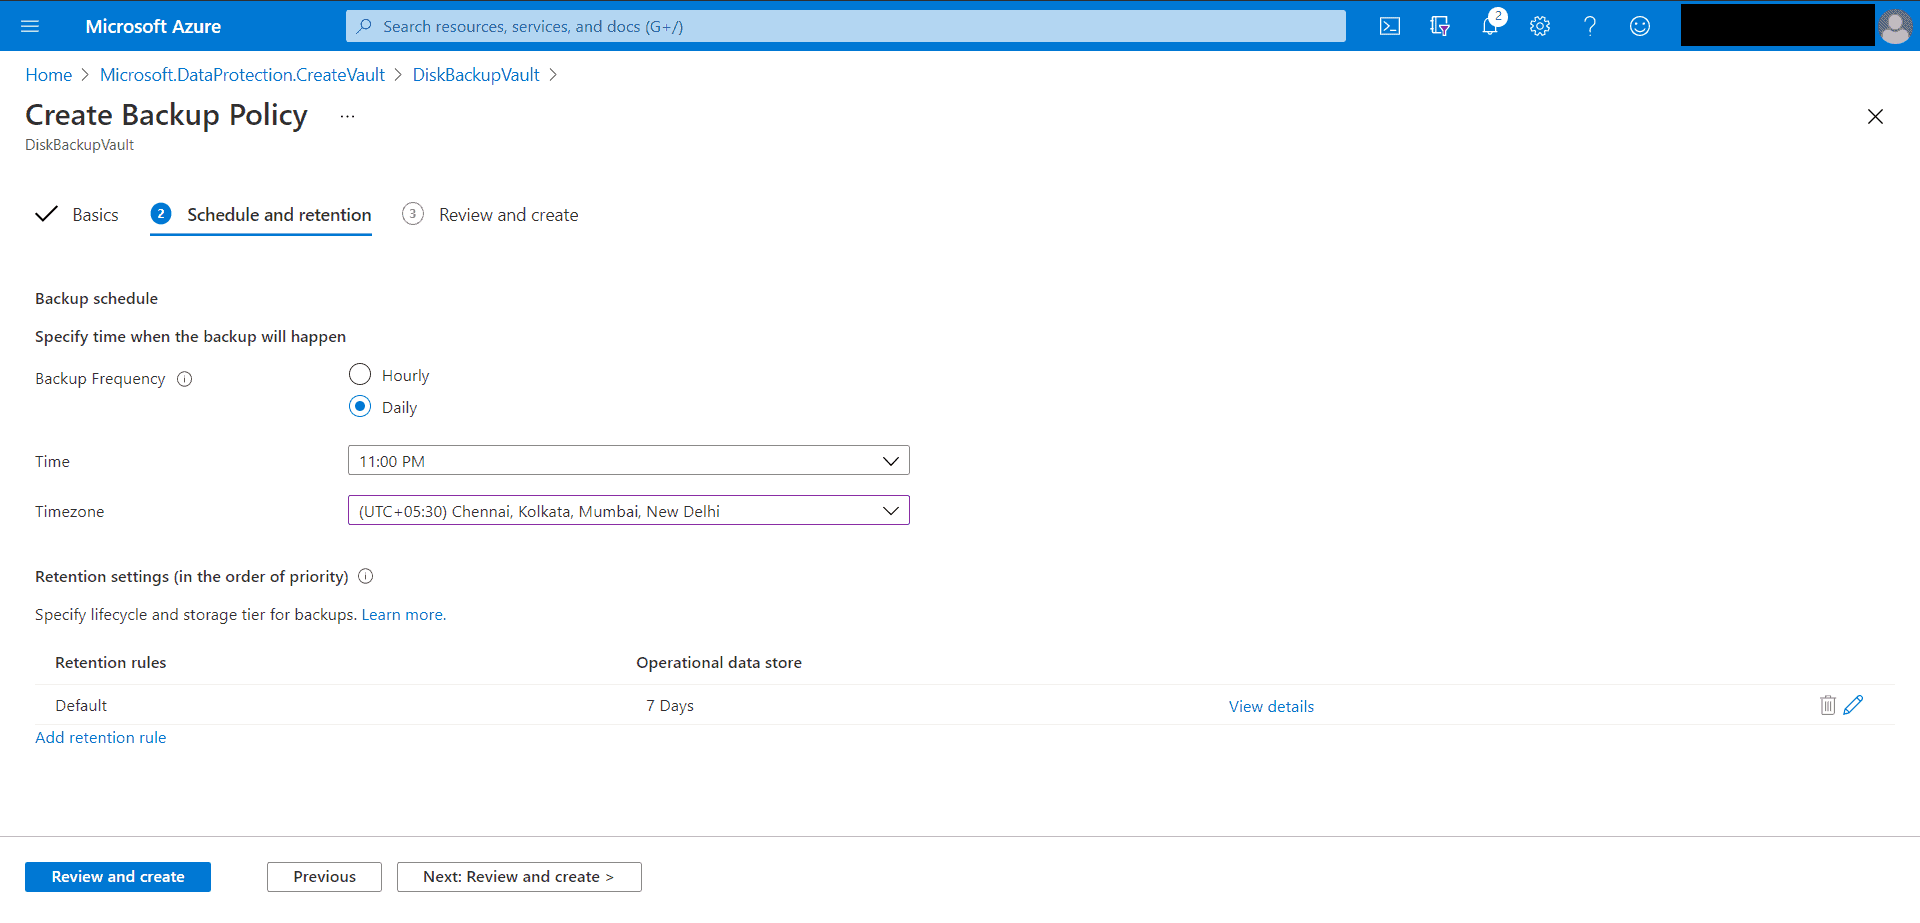
 In the Backup Policy tab, select the backup frequency. Azure Disk Backup offers multiple backups per day. If you require more frequent backups, choose the Hourly backup frequency with the ability to take backups with intervals of every 4, 6, 8 or 12 hours.
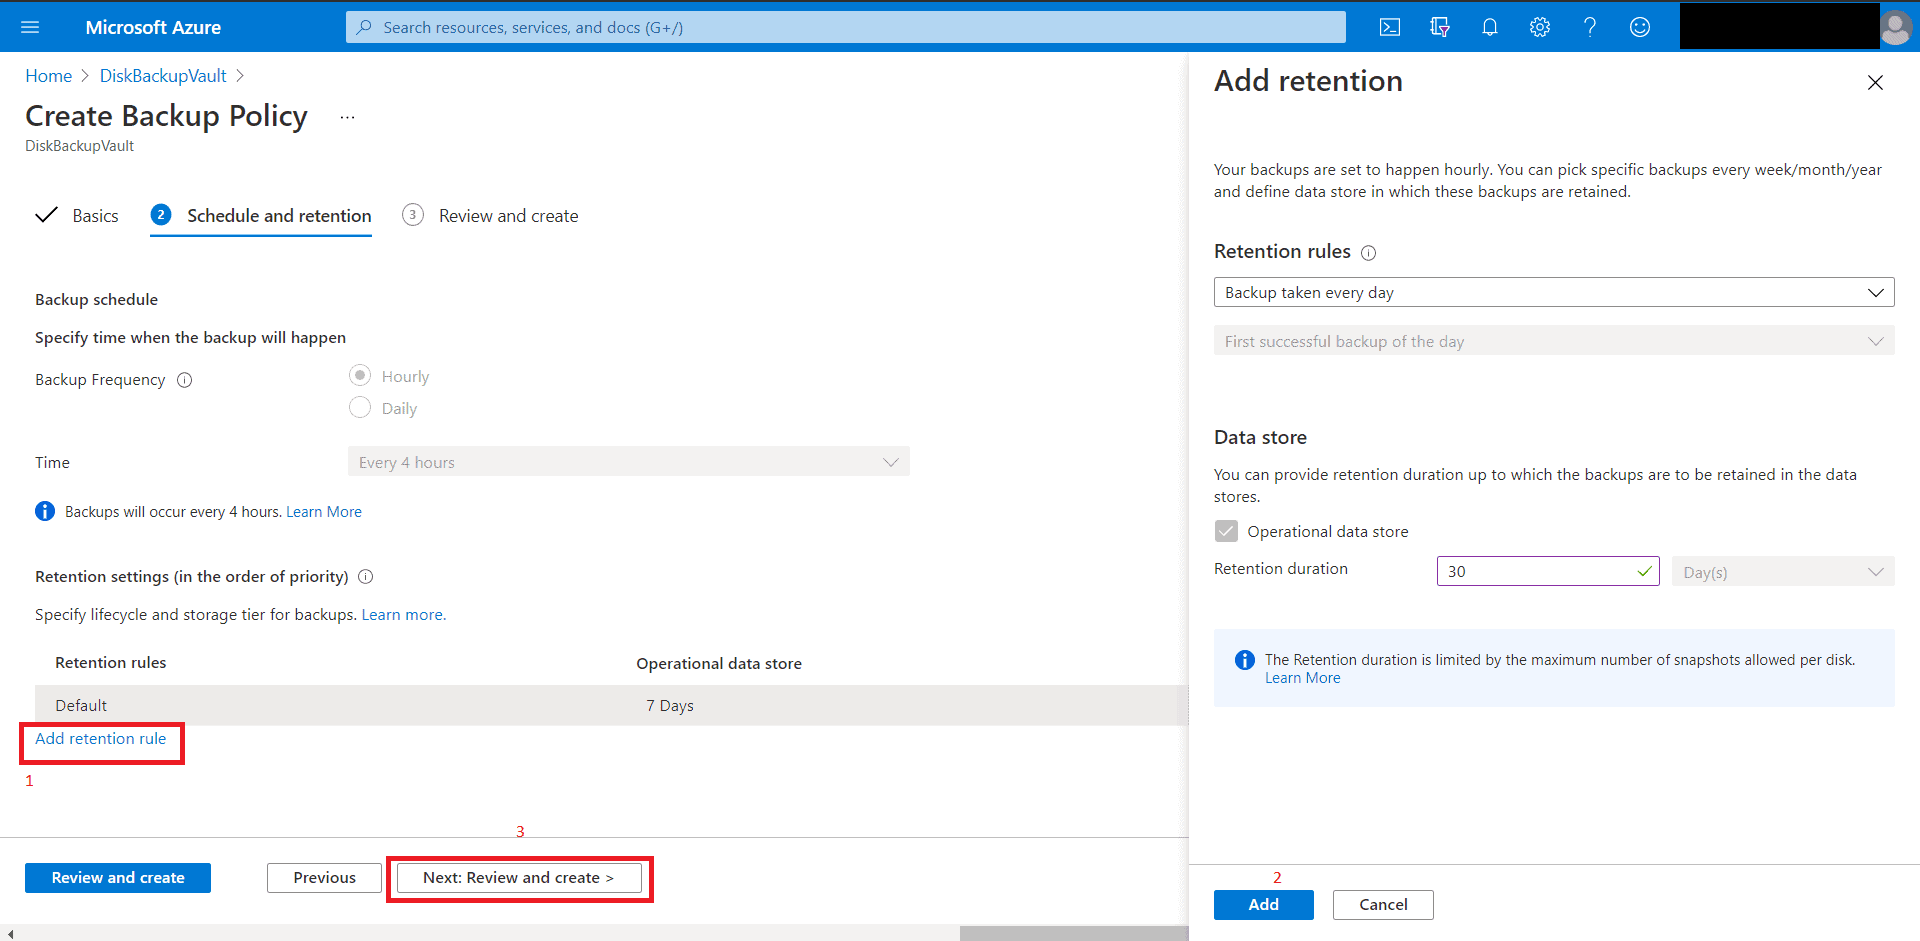
 Select retention settings that meet the recovery point objective (RPO) requirement. The default retention rule applies if no other retention rule is specified. The default retention rule can be modified to change the retention duration, but it cannot be deleted. Click on Add retention rule to add a new rule as per your requirement. Click on Review and Create.
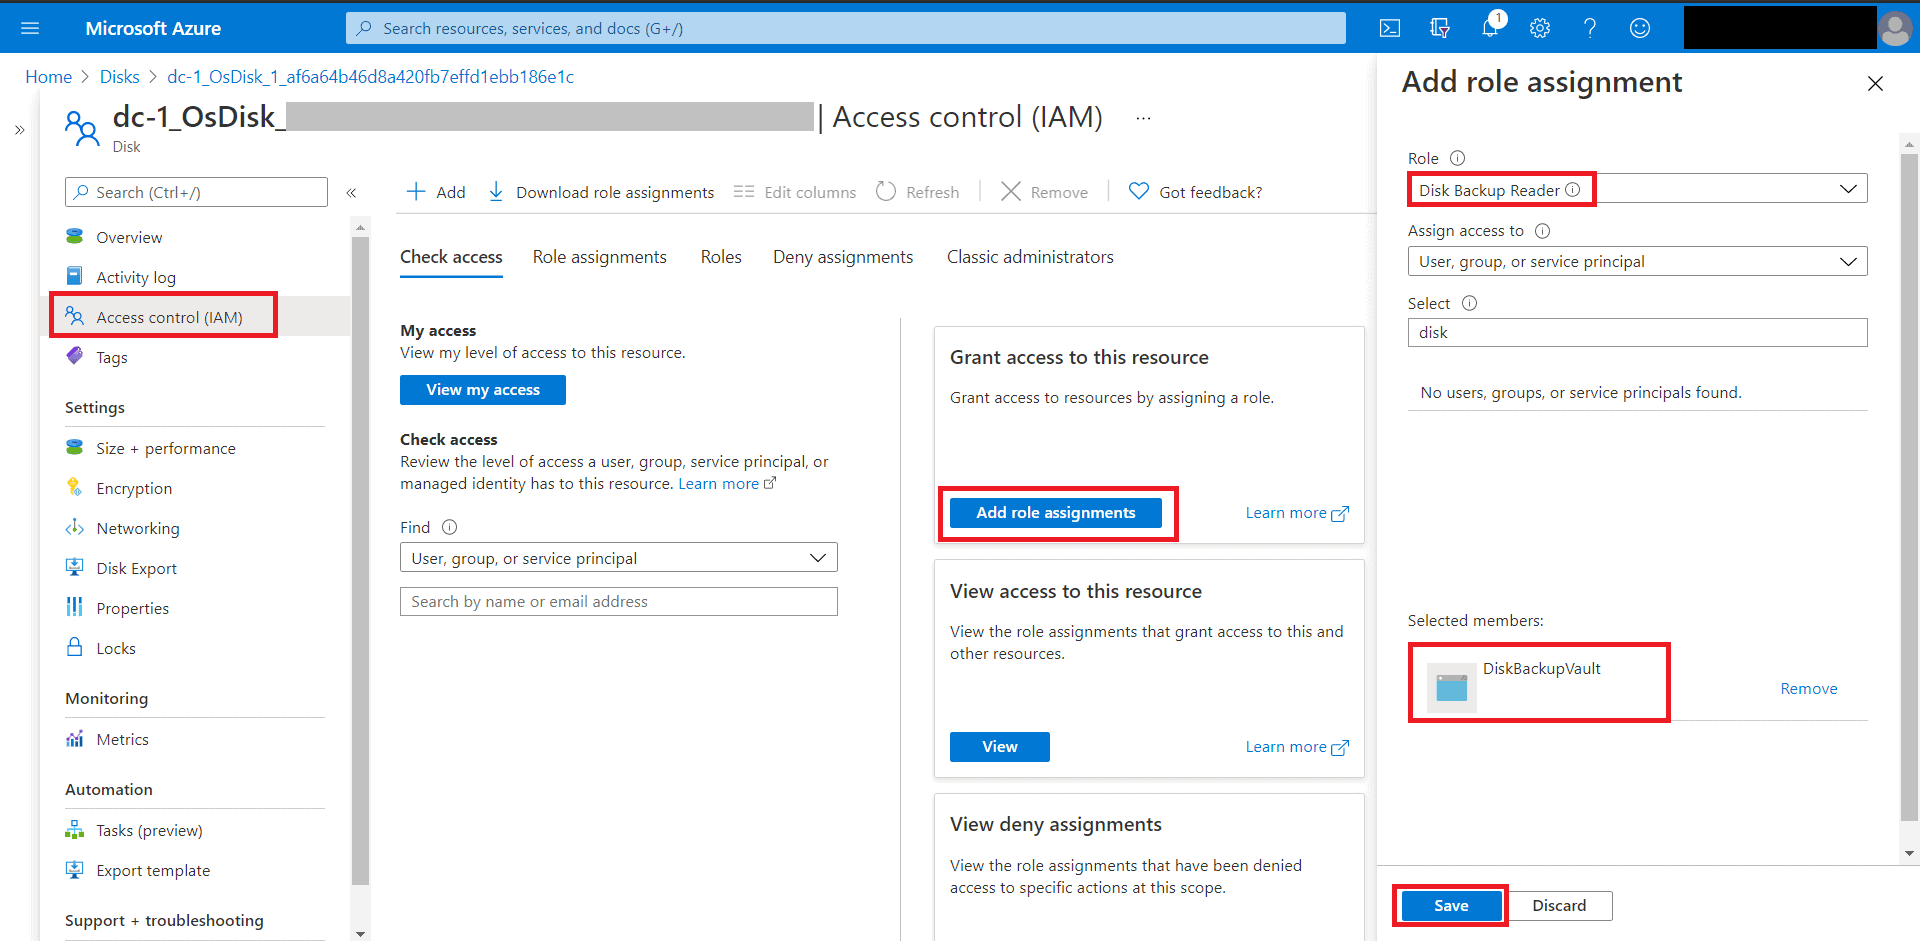
Step 3. Configure Backup: Backup vault’s managed identity requires a set of permissions on the source disks and resource groups where snapshots are created in order to configure backup of managed disks.
- Go to the disk that needs to be backed up.
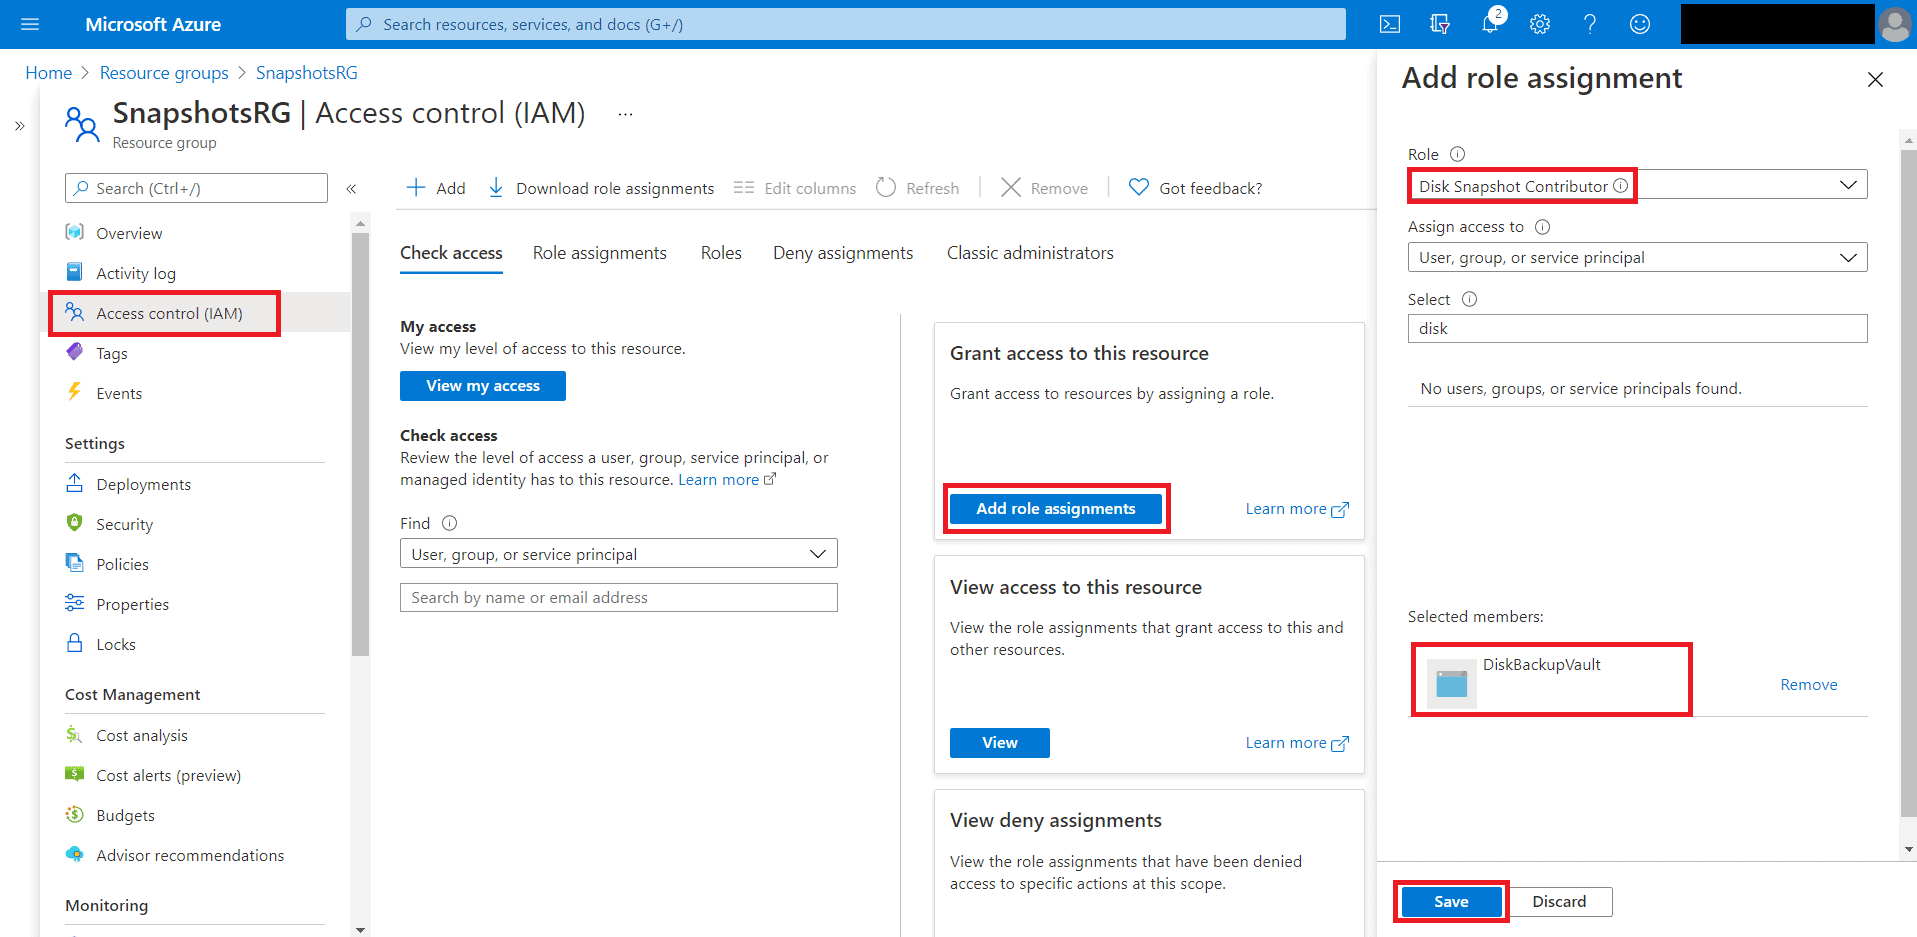
- Go to Access control (IAM)and select Add role assignments
- On the right context pane, select Disk Backup Reader in the Role dropdown list. Select the backup vault’s managed identity and Save.
Assign the Disk Snapshot Contributor role to the Backup vault’s managed identity on the Resource group where backups are created and managed by the Azure Backup service. It’s recommended to not use the same resource group as that of the source disk and to create a dedicated resource group for snapshot datastore to be used by the Azure Backup service. This resource group can be used for storing snapshots across multiple disks that are being (or planned to be) backed up.
- Go to the Resource group which is in the same subscription as that of the disk to be backed up.
- Go to Access control (IAM)and select Add role assignments.
- On the right context pane, select Disk Snapshot Contributorin the Role dropdown list. Select the backup vault’s managed identity and Save.
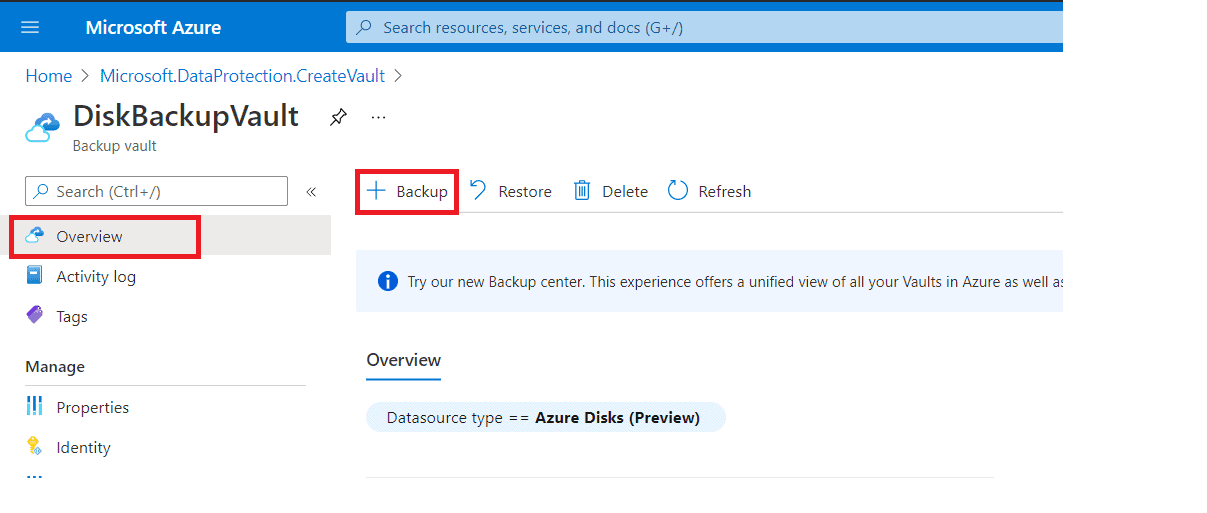
 Go to Backup vault – > overview and select Backup to start configuring backup of the disks.
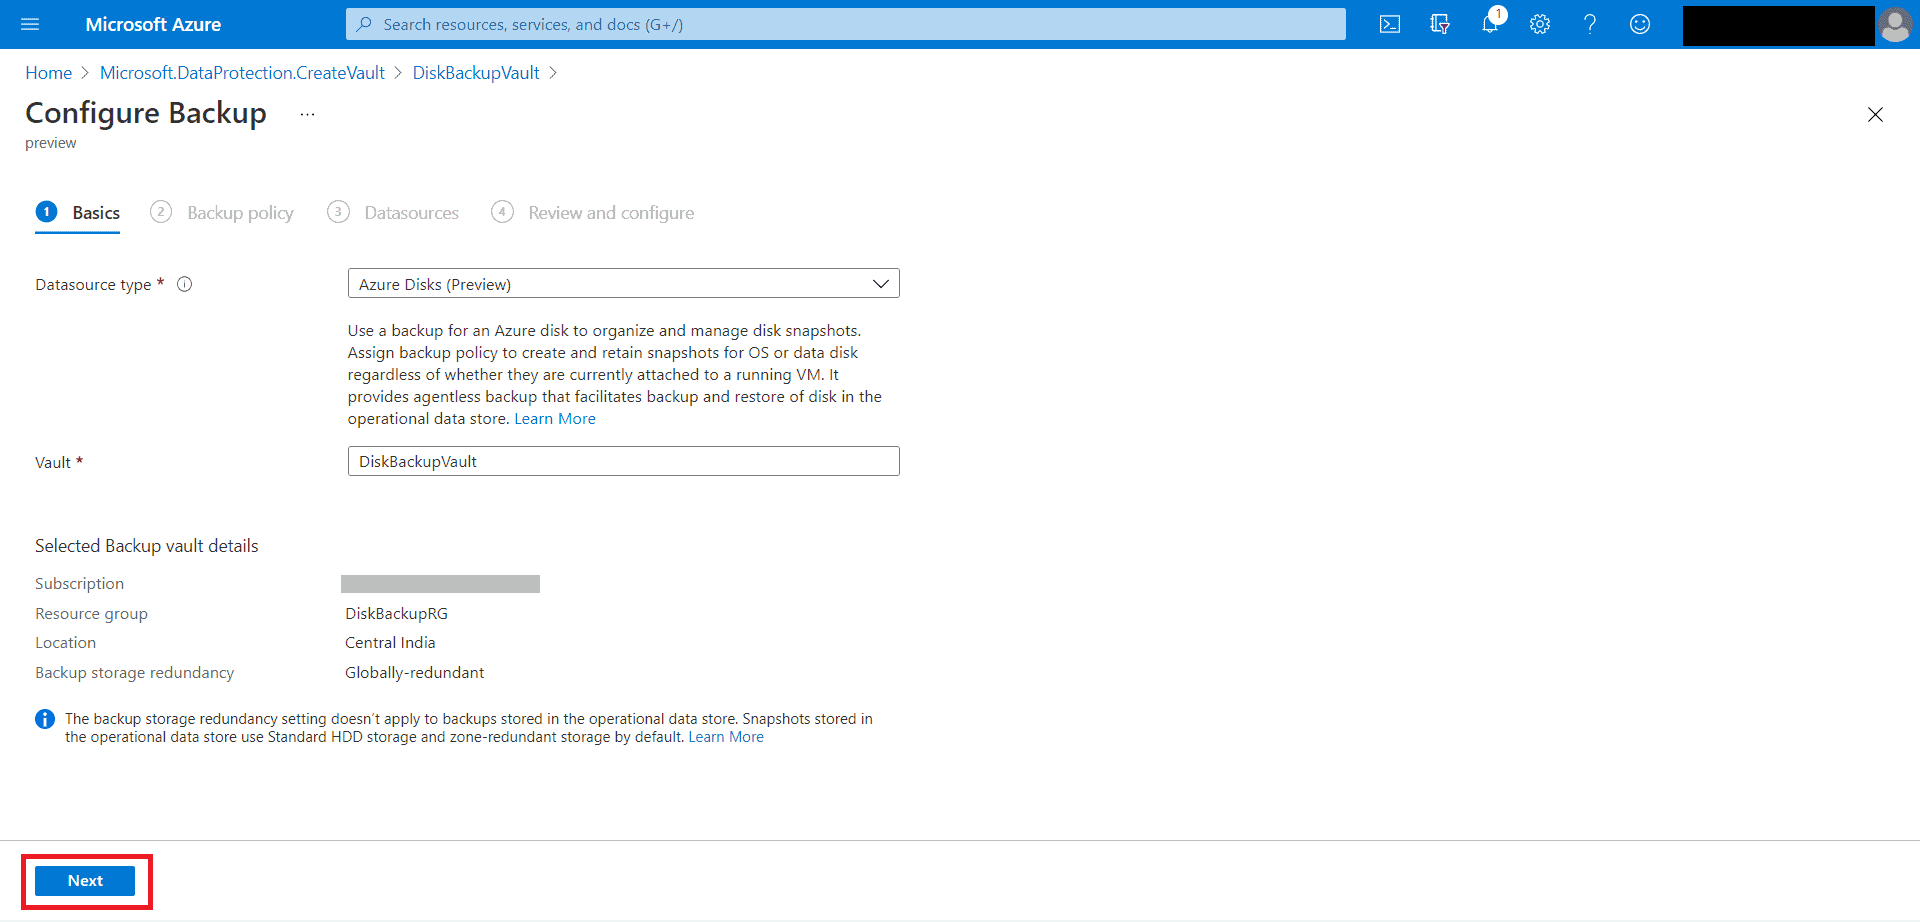
 In the Basics tab, select Azure Disk as the Datasource type and click on Next.
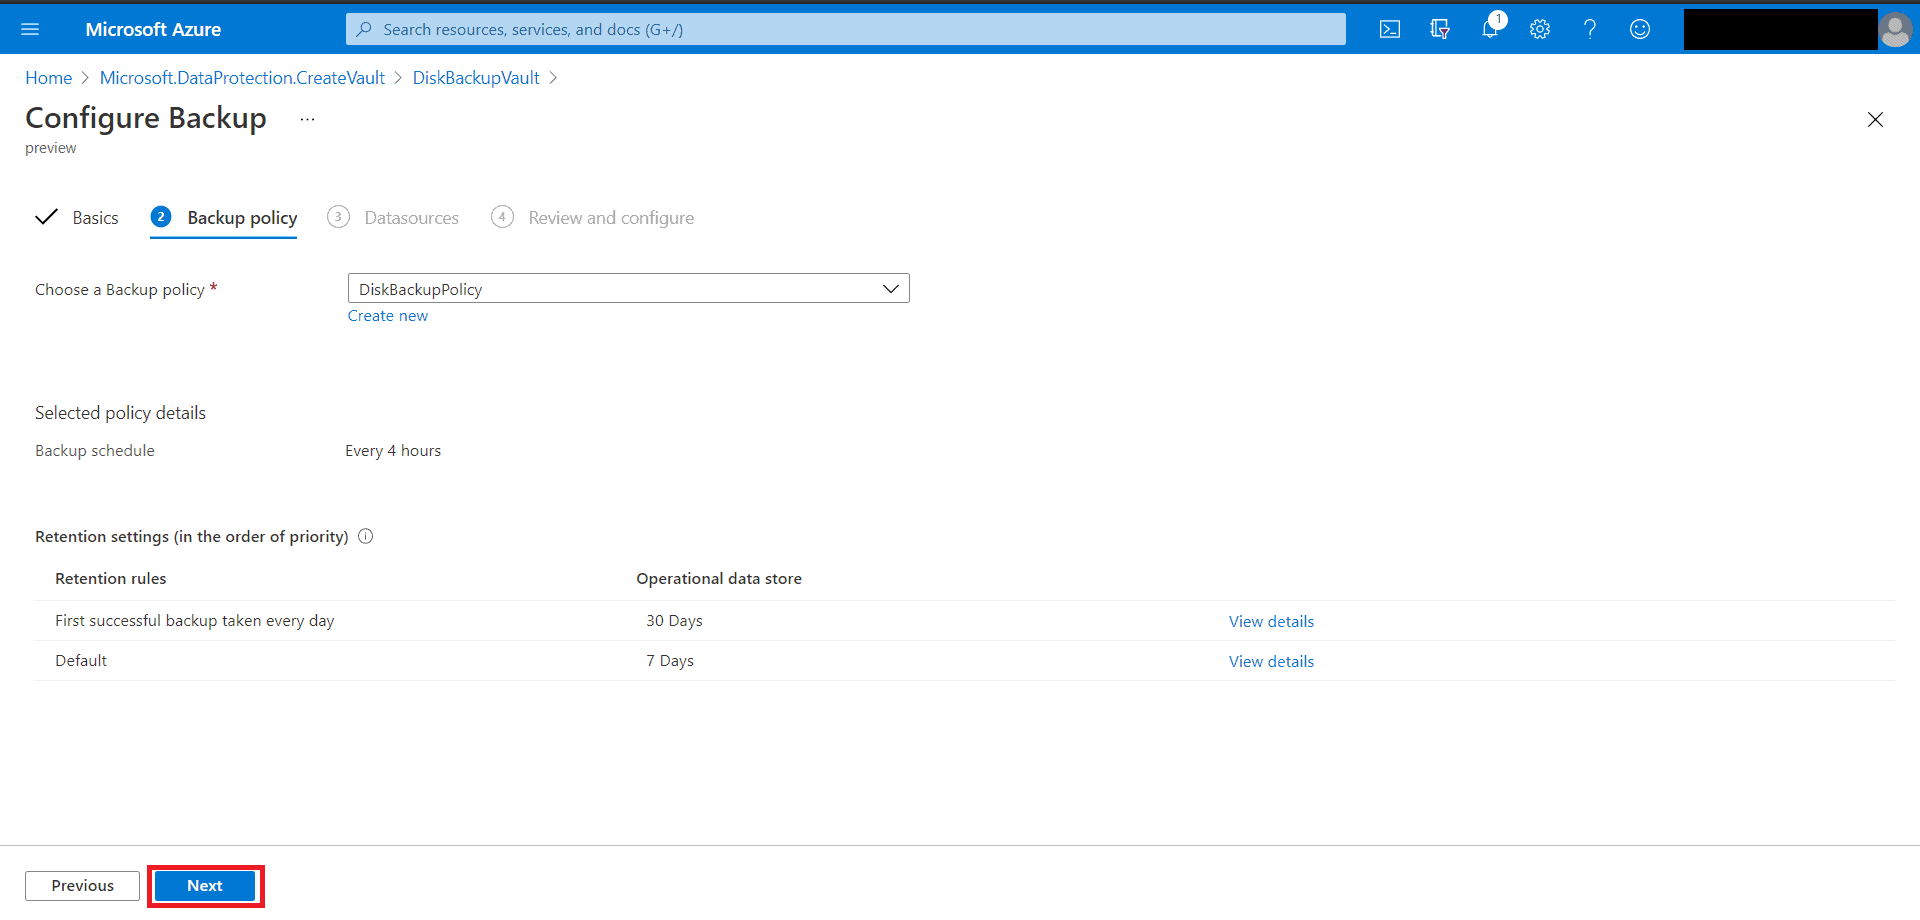
 In the Backup policy tab, choose a backup policy and click Next.
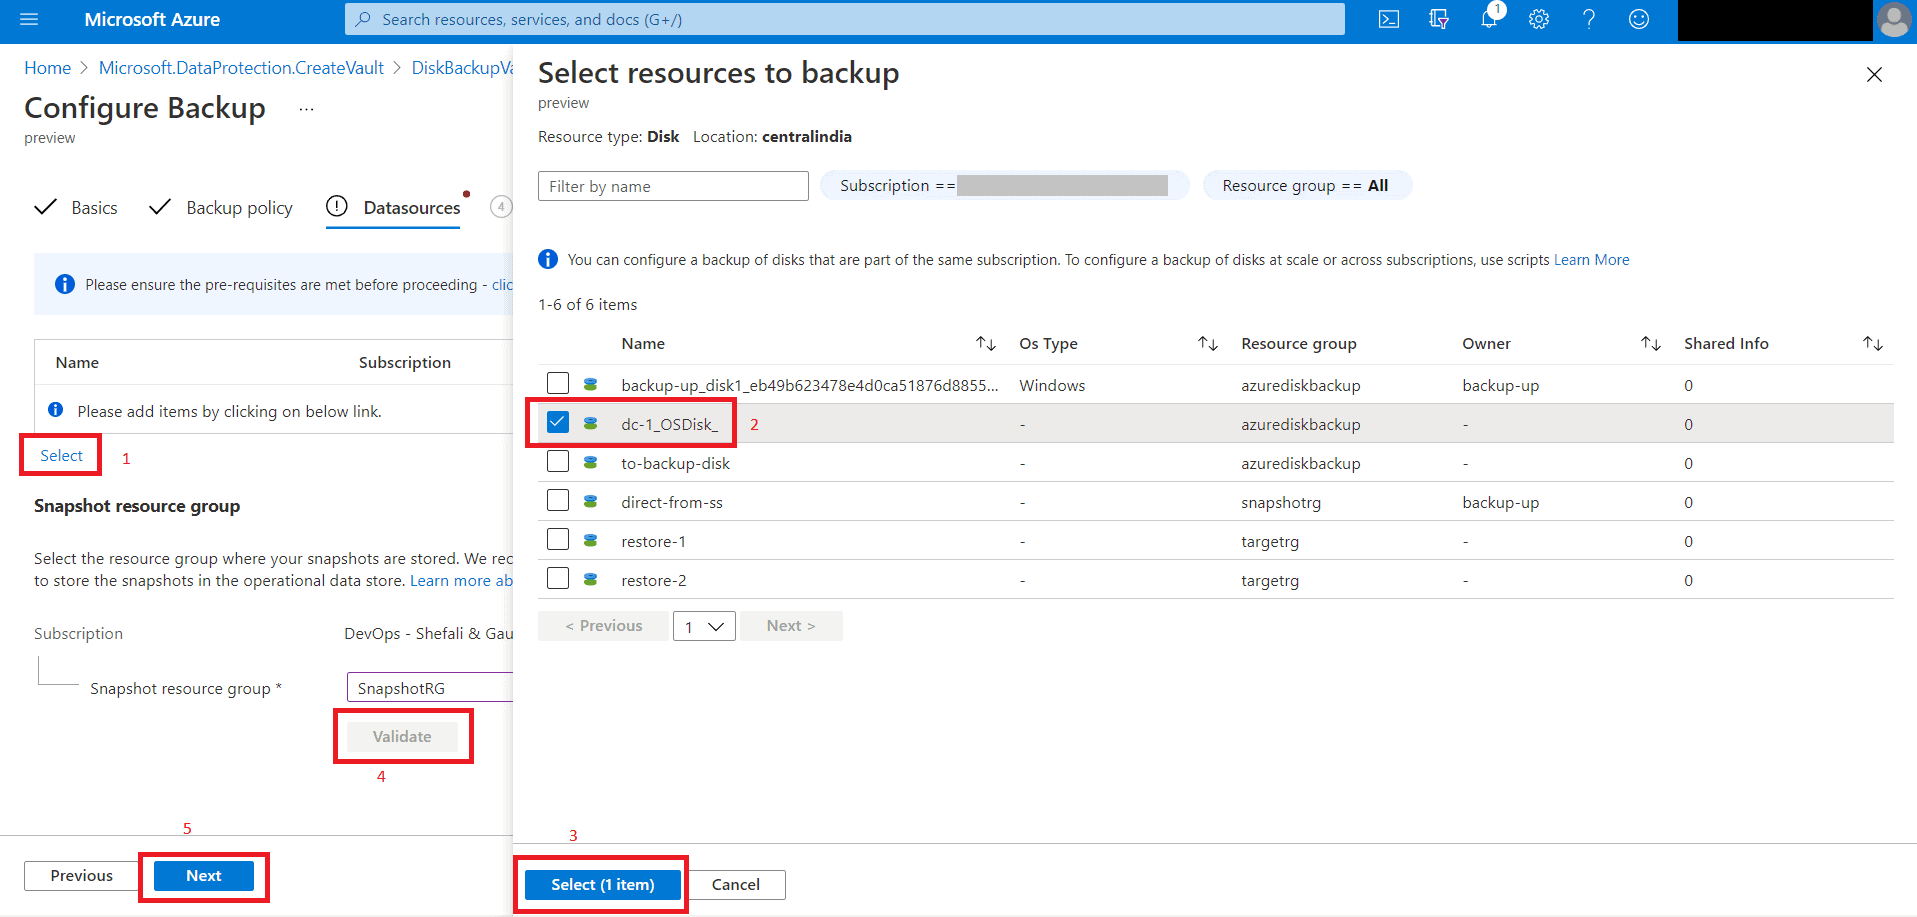
- In the Resources tab choose the right resource group, click on select. On the right context pane, select the disks to be backed up and then validate the resource group. Click on Next.
- Review and Configure.
Step 4. Run an on-demand backup:
- In the Backup vault created in the previous step go to Backup instances and select a backup instance.
 Select Backup Now to initiate an on-demand backup.
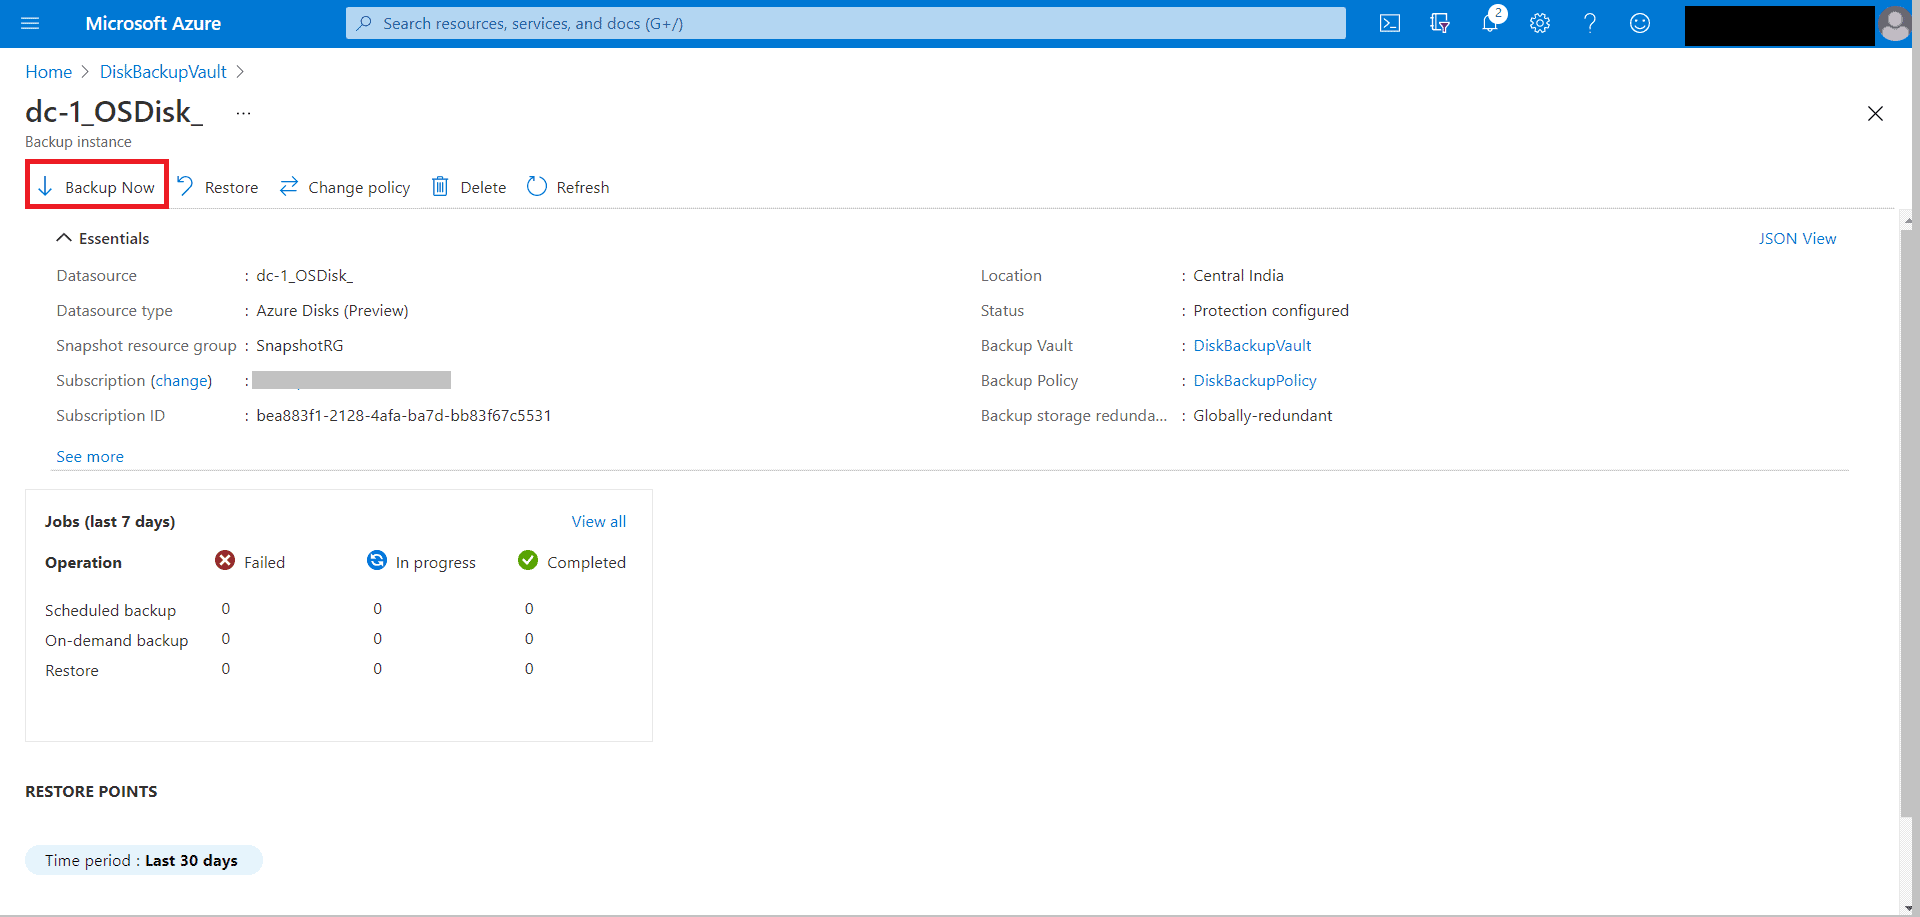 Select one of the retention rules associated with the backup policy. Select Backup now to start the backup.
Wrap Up
You can track the backup operation by going to the Backup instance screen. It shows the jobs dashboard with operation and status for the past seven days.
Hope this article was helpful and will guide you to perform the backup of Azure Disk. You can post your thoughts/queries in the comment section.


