Data Migration Assistant
The Data Migration Assistant is migration tool developed by Microsoft.
The Data Migration Assistant (DMA) helps you upgrade to a modern data platform by detecting compatibility issues that can impact database functionality in your new version of SQL Server or Azure SQL database.
DMA recommends performance and reliability improvements for your target environment and allows you to move your schema, data, and uncontained objects from your source server to your target server.
NOTE: For larger migrations (in terms of numbers and size of databases), it is recommended to use Azure Database Migration Service, which can migrate databases at scale.
Data Migration Assistant Capabilities:
Data Migration Assistant provide two type capabilities
- Assessment: On-premises SQL database assessment.
- Check database compatibility issues.
- Check feature parities.
- Migration: Migrate On-premises SQL database into Azure.
- upgrades to later versions of SQL Server or migrations to SQL Server on Azure VMs or Azure SQL Database.
Prerequisites:
- Connectivity with on-premises through site to site or point to site.
- Make sure you have .NET Framework 4.8 installed before installing DMA.
- .NET Framework 4.8 installation link:
- https://dotnet.microsoft.com/download/dotnet-framework/net48
- Install Data Migration Assistant
- Best practice is not to install and run the Data Migration Assistant directly on the SQL Server host machine.
- Data Migration Assistant Installation Link:
- https://www.microsoft.com/en-us/download/details.aspx?id=53595
Assessment with DMA:
Create a new Assessment Project
- Open Data Migration Assistant tool in your local machine.
- Create a new assessment for your database.
- Select target server type as SQL server on Azure Virtual Machines.
Select the version for Target
- Select the target version or the upgraded version.
Add the source
- Connect to your source server with credentials.
- Make sure to check both the connection properties.
Add databases
- Add the databases for the assessment.
Start Assessment
- After selecting the databases, you can start the assessment.
View Results
- After the assessment you can review the results.
Migration with DMA:
Create a new Migration Project
- Open DMA in your local machine.
- Create a migration for your database.
- Select target server type as SQL server on Azure Virtual Machines.
Specify the source and target
- Specify credentials for your source and target servers.
- Select the authentication type supported by the source and target server.
Add databases and provide the shared folder
- Before providing the share folder, do the following steps in source server.
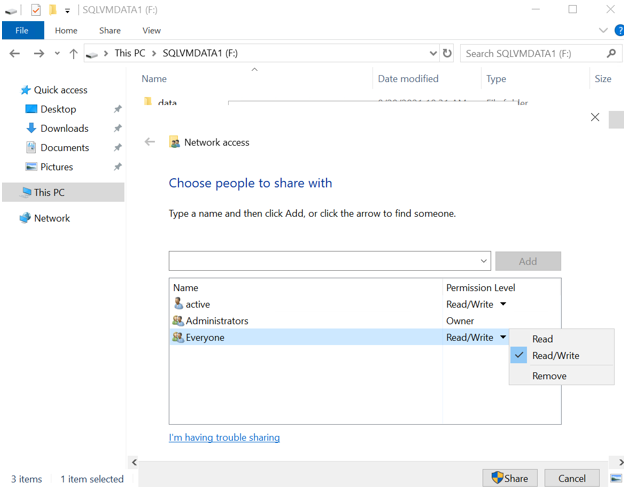
- Make sure that the user account running Data Migration Assistant has read privileges to the backup location and write privileges to the location from which the target server restores.
- Open services.msc on Run command.
- Search for SQL Server (MSSQLSERVER) and got to properties.
- Under the LogOn section browse for the admin for your source server.
- After this, restart the account service.
- Enter the shared location to which source and target server both have access to and folder should be created on the target server.
- If you can’t provide a shared location that both the source and target SQL Servers have access to, select Copy the database backups to a different location that the target server can read and restore from.
- To avoid the copy operation if possible. A copy operation may introduce delay based on the size of backup file. The copy operation also increases the chances that a migration will fail because of an extra step.
Select Logins
- Select specific logins for migration.
- By default, all the SQL Server and Windows logins that qualify for migration are selected for migration.
- Start the migration.
View Results
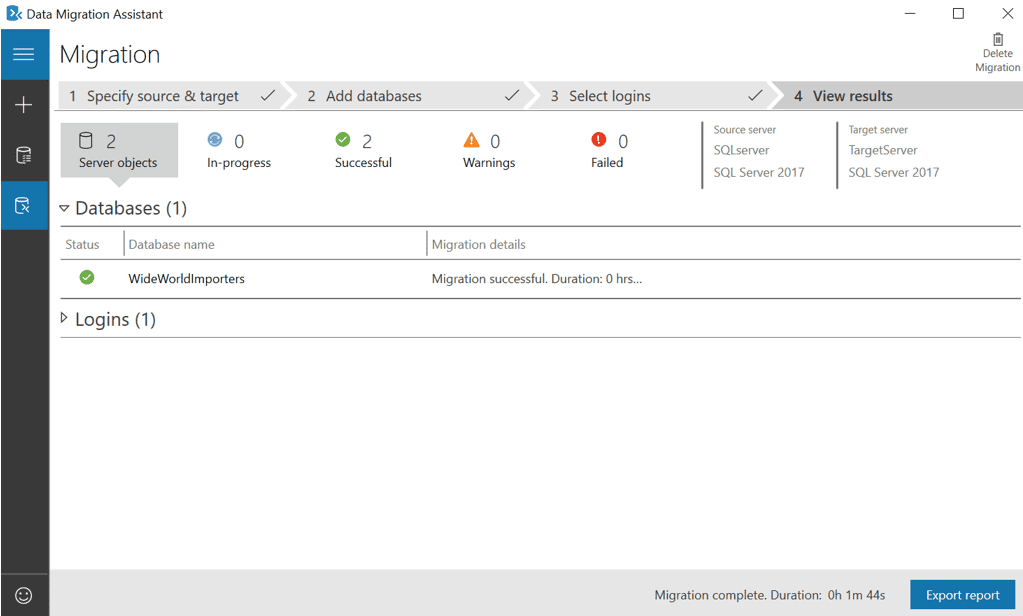
- Check your migration progress results on the View results.
- Finally, the database is migrated successfully.


