Deployment of Web Application Firewall with Application Gateway
Application security is enhanced by integrating WAF into Application Gateway. Protect your web applications against vulnerabilities and web attacks without modifying backend code. We can also protect multiple web applications at the same time. An Application Gateway instance can host up to 40 websites protected by Web Application Firewall. Additionally, we can customize WAF policies for different sites behind the same WAF.
Using Application Gateway WAF, we can additionally defend our web applications against malicious bots and XSS attacks, SQL injection, and other vulnerabilities.
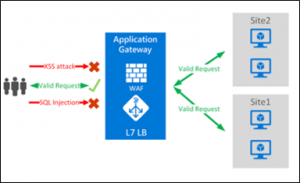
Prerequisite:
- Create a website and host it into IIS server and enable the required port inside the Azure Virtual Machine and on the NSG.
- In register Domain name create A name record and add Application Gateway public Ip to it.
Follow the steps for deployment:
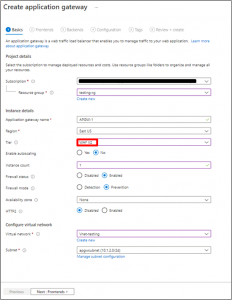
- In Basic Tab fill the required as shown below. Select Tier as “WAF V2” & Firewall mode as “Prevention”.
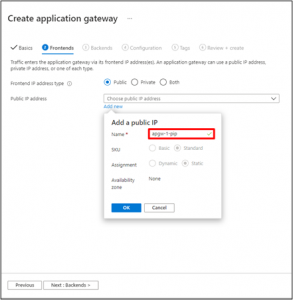
- On the Front-ends tab, verify Front-end IP address type is set to Public. Choose Create new for the Public IP address and enter public IP address name, and then select OK.
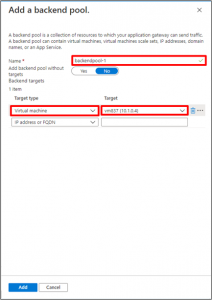
- The Back-end Pool, you will create back-end pool with your application gateway and then add back-end targets to the back-end pool.
4. On the Configuration tab, you’ll connect the frontend and backend pool you have created using a routing rule.
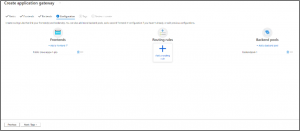
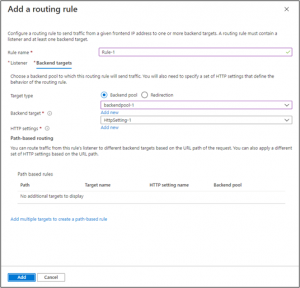
5. In the Add a routing rule window that opens, enter “Rule-1” for the Rule name. A routing rule requires a listener. On the Listener tab within the Add a routing rule window, enter the following values for the listener. Ensure that you provide your custom domain of the website in the Hostname field.
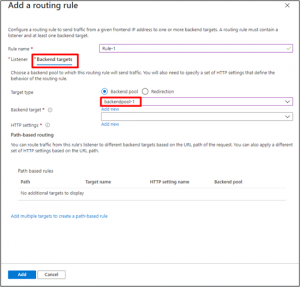
On the Backend targets tab, select “backendpool-1” for the Backend target. Click Add new for HTTP setting.
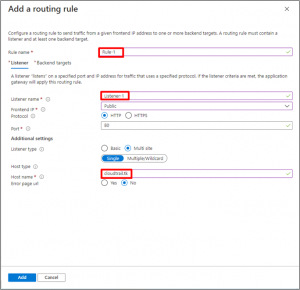
- In the Add a routing rule window that opens, enter “Rule-1” for the Rule name. A routing rule requires a listener. On the Listener tab within the Add a routing rule window, enter the following values for the listener. Ensure that you provide your custom domain of the website in the Hostname field.
- In the Add an HTTP setting window that opens, enter “HttpSetting” for the HTTP setting name. Accept the default values for the other settings in the Add an HTTP setting window, then select Add to return to the Add a routing rule window.
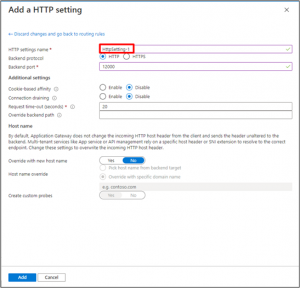
- On the Add a routing rule window, select Add to save the routing rule and return to the Configuration tab.
- On Configuration Tab, you can see Frontend, Routing Rules & BackendPool has been added.

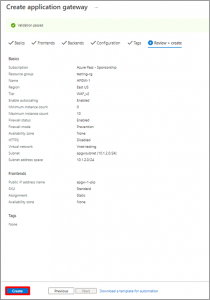
- Select Next: Tags and then Next: Review + create. Review the settings on the Review + create tab, and then select Create to create application gateway.
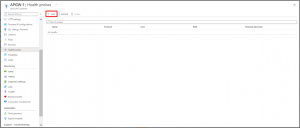
- Once Application Gateway is created, Go to Health Probe and Click to “Add”.
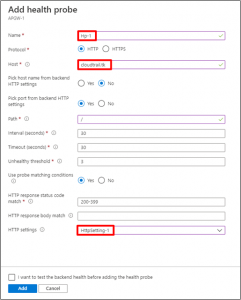
- Creating a health probe for the websites. Add host name to it.
- Go to Backend health blade helps us verify whether the setup is working as expected. It would yield the results based on the probing checks of the health probes.
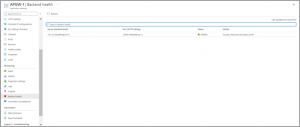
- Now hit the website, Check the response. A valid response verifies that the application gateway was successfully created and can successfully connect with the backend.

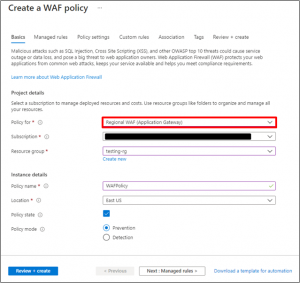
- To start, deploy a new WAF Policy, choose the “Regional WAF as policy” & Select Policy Mode As “Prevention”.
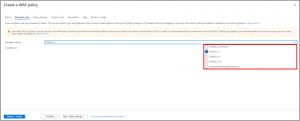
- Select the OWASP rule set.
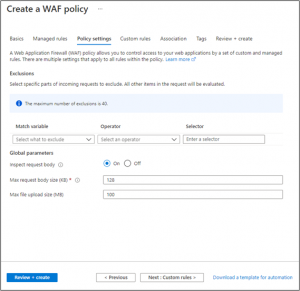
- Customize Policy settings if you need
- Go to Custom Rules and Click to Add.
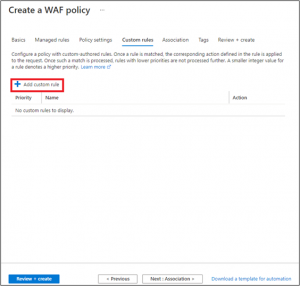
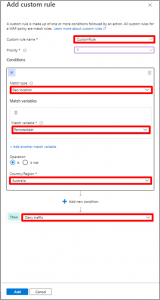
- We can configure a custom rules section to match the rule. As shown in the image below Review your settings, then create!
Provide the Custom rule name Priority
In Condition, Select Match Type As “Geo-Location”
Select Match Variables as “RemoteAddr”
Select Operation as “Is”
So, based on my example with Australia my Custom Rule now looks like this:
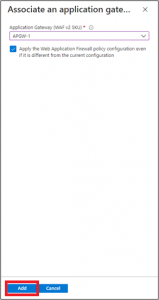
20 .At Association click on Add association and Select Application gateway.
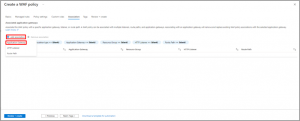
- Select Application Gateway in drop down
Remember that this policy will need to overwrite the default Application Gateway’s WAF policy. So before proceeding migrate your current WAF settings and customizations to the new WAF policy.
- On Tags Tab provide the tag name and value for Web Application Firewall policy.
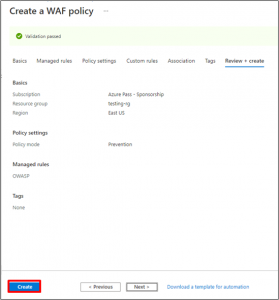
Click Next on Review + Create.
- When the policy is applied (Australia) and if I navigate to the website, I will have a forbidden message (As website Browsed from Australia Region.)

- Now If I hit Website from another Region (US and India) it’s working.

Resources
Web application firewall for Azure Application Gateway (Microsoft Azure Documentation)
Geomatch custom rules(Microsoft Azure Documentation).
Conclusion
Here, we have arrived at a conclusion about what exactly Azure WAF (Web Application Firewall) is. It acts as the first line of defense, and it allows you to make sure that the application is safe by putting in a reasonable amount of initial effort.
To protect from malicious attack, we can use Azure WAF to protect the application even from the most sophisticated threats before they reach your servers.


